I collect a lot of MCU stuff, mostly sixth scale but some 1:1 props as well. I decided I wanted to add a couple of these bad boys to my collection:
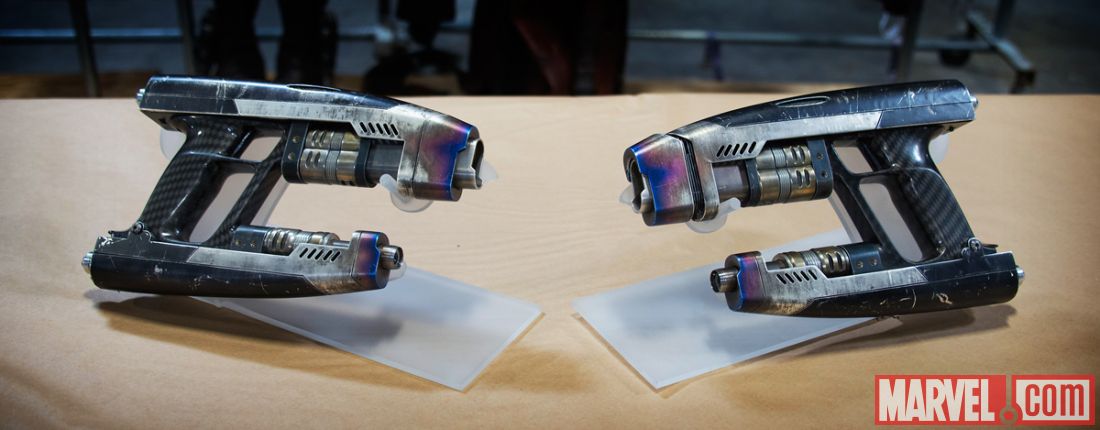
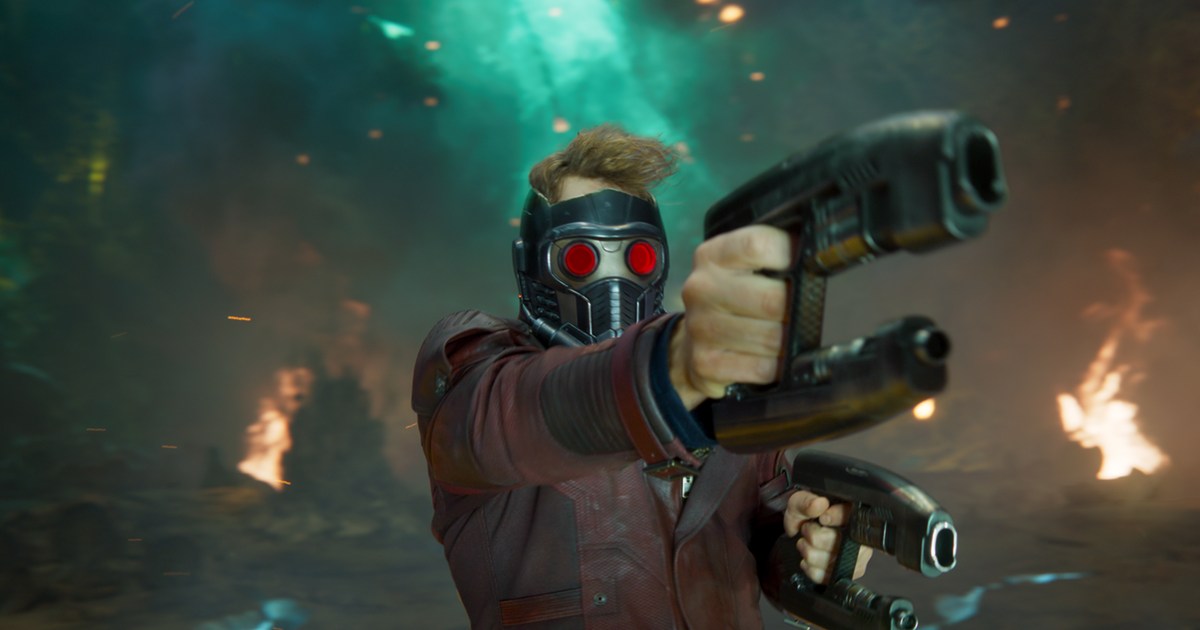
I’ve got the Marvel Legends Star Lord Helmet I’m planning to repaint, and these dual blasters would look great on display next to it. So, I started poking around online, and while I found a handful of models for 3D printing, none of them were quite as screen-accurate as I would have preferred. So, with my limited modeling skills, I set out to remedy that.
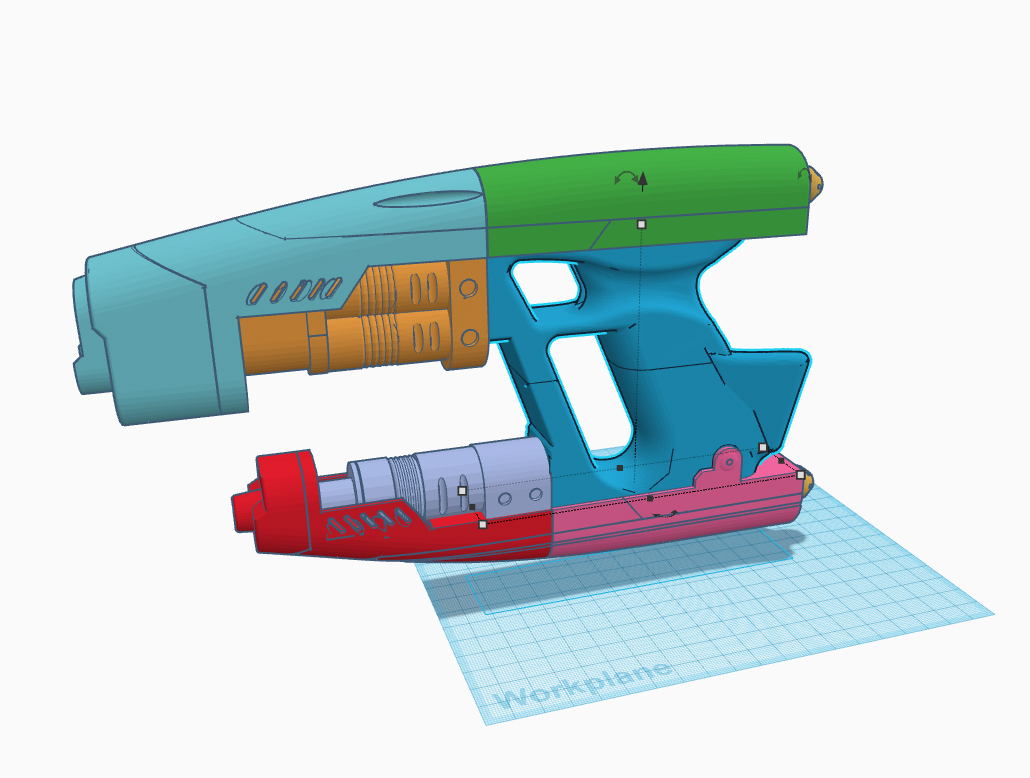
The final model, cut up into printable parts. I kept the handle an individual piece because I was going to have to wrap it in 3M carbon fiber vinyl.
From there, it was just a matter of printing all the pieces over a matter of days. A couple of parts fresh off the printer, ready for trimming the rafts and support material.
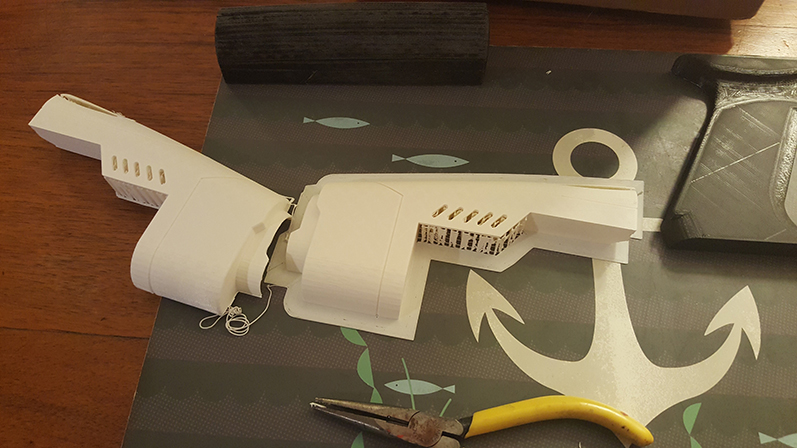
Installing the little grate pieces. I wanted these to be separate to provide a more authentic look.
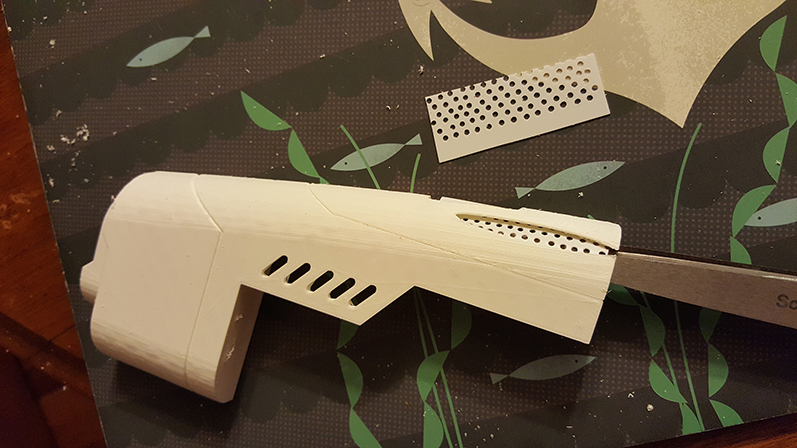
Putting the top barrel pieces together, followed by lots of tedious sanding (3D Prints tend to exhibit striations from the individual layers of plastic, that don’t look good for a finished piece).
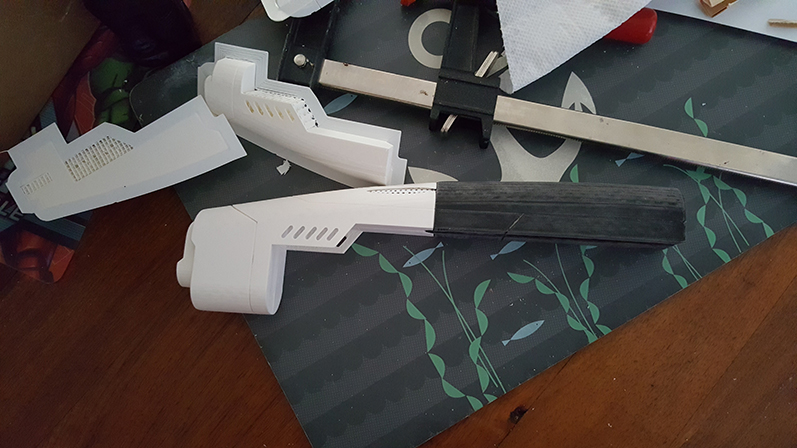
The first layer of bondo, to fill any seams and gaps. Then more sanding.
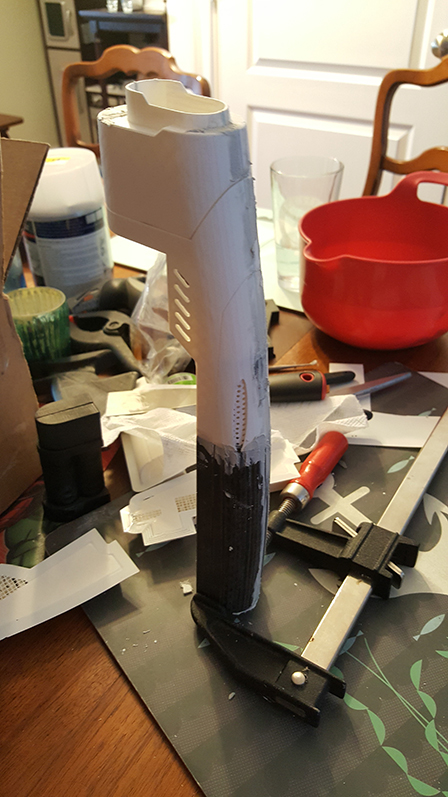
I used an epoxy putty to form some of the more complex curves of the handle, since they were beyond my meager modeling skills.
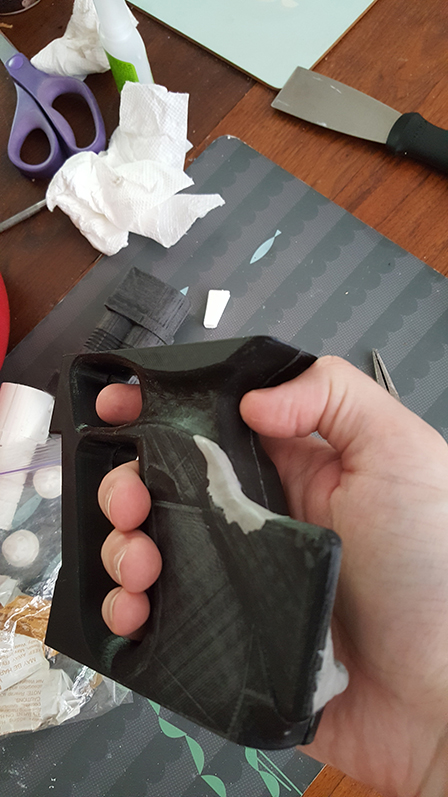
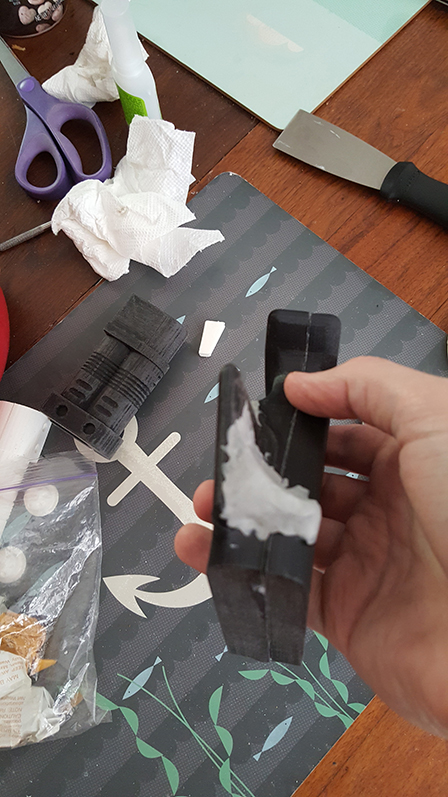
After hours sanding and patching everything, a thin quick layer of primer makes it easier to see what still needs work.
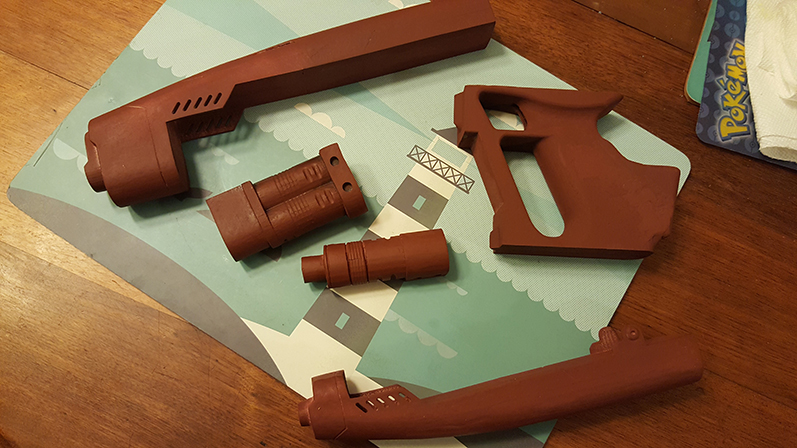
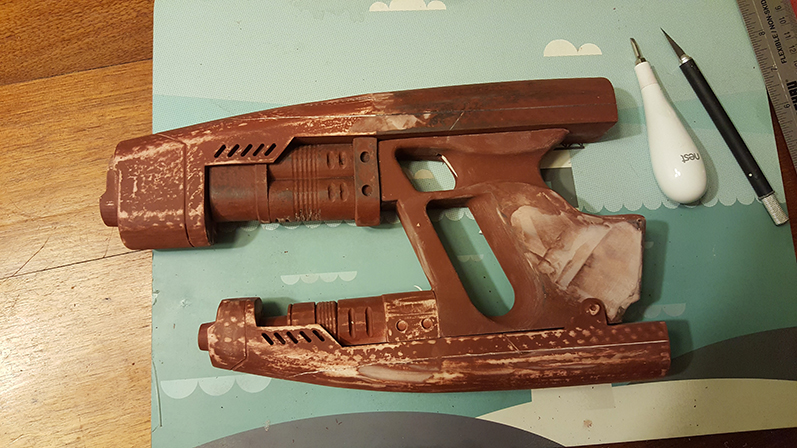
More bondo, more sanding, and dry-fitting the pieces together.
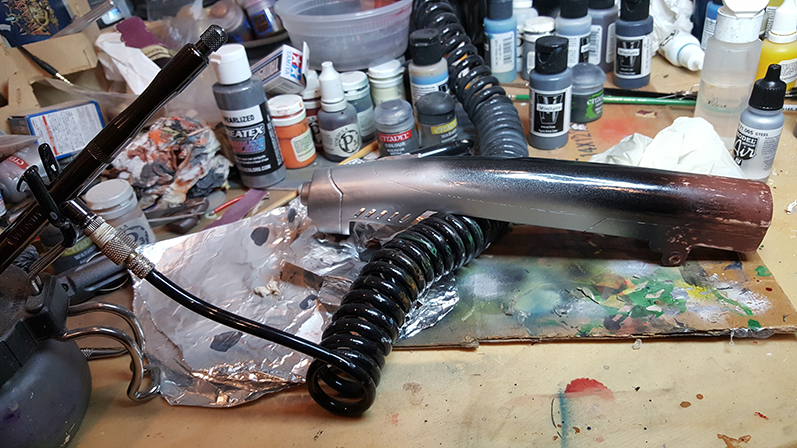
There were a number of further steps of applying an enamel gloss spray, wet sanding, enamel spray, more wet sanding, etc, etc that I did not photograph, but eventually it was time for some real paint!
Finally, after a lot of crunch hours, the finished blaster (right hand)!
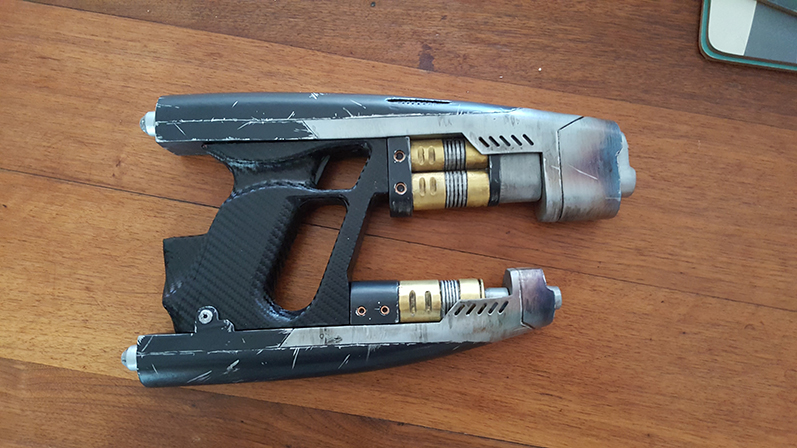
Overall I’m pretty happy with how it turned out. I was really rushing to get it finished by last weekend, because I was taking the family to Hascon, and I was hoping to get a chance to meet James Gunn and have him sign it. Unfortunately, being a first-year event, their autograph voucher setup was a bit of a clusterfuck, and I was not fortunate enough to make that happen. I’ll have to keep an eye out for his future appearances and hopefully I’ll get another chance.
In the meantime, I do still have a left-hand blaster to make. There are a few things I’d like to tweak/do differently now that I’m not rushing, so I may take the opportunity to make those changes and make molds this time, so I can cast my parts in resin instead of PLA (and it will make it easier to create a pair of guns).


Just plain and simple: WOW!
I did some 3D printing myself and I’m building my own Mandalorian Armor at the moment (since over a year to be precise >.<) and I have a pretty good idea of the job you did there.
Absolutely awesome d_(*^*)_b
That’s pretty cool. Would you mind making the pictures available in a higher res somewhere?
If you right-click and open the pics, they’re a bit bigger.
True. Thx!
Hey Tim,
Working on chrome (of some version), and noticed that when I switch comics or newsposts previous or next, the comments seem to not load. Clearing cache/cookies sometimes works, sometimes not.
I’m not a computer guy, so this may be something on my end instead of a bug. I still get to read the comics, but sometimes it’s nice to read the comments and participate as well.
I am impressed man. I actually work at 3d printing service bureau and you used some more advanced finishing techniques. If you do this again, I recommend trying “Smooth-On” to help fill in the layer lines. The other technique I would practice then try, is acetone melting. That looks to be fdm or pla maybe, but acetone will actually attack the plastic, but if done right it can be used to smooth as well. Keep up the awesome!
There is actually a layer of XTC Smooth On on most of the parts, followed by some sanding. I use it sparingly because I still find it pools in small details and becomes very difficult to sand out.
I’ve not yet worked up the nerve to try acetone melting a PLA part yet. I understand the process, I just haven’t wanted to mess around with those chemical fumes thus far 😀
Acetone only melts ABS, just fyi.
Right, it’s chloroform for PLA I think? Either way, never done it 😀
Did you design the whole thing in tinkercad? Thats crazy, I can’t get tinkercad to do any fine detail designs.. I have to use fusion 360 for stuff I do.
I keep telling myself one day I’ll find some time to learn the basics of a real modeling program. Doing anything complex in TinkerCAD requires like 40 steps to achieve what a couple could do in another program. But the interface is easy enough, so… 😀
I just want to say.
Holy Crap!
That looks awesome. Good job.
I am thinking of getting a 3D printer. I would mainly use it for Gunpla parts and weapons. What printer do you use and would you recomend it?
I’ve only used the Ultimaker 2 that I own. That said, if you know you’ll mostly be printing Gundam model parts, and as those are relatively small, you could look at a smaller printer to save some money. I hear a lot about Makerbot’s printers, and I believe they’re pretty popular.