


So when we left off last time (Part 1 here and Part 2 here), I was right at the end of the Settlement phase. Starting up this time, all that’s left to do is prepare my departing survivors for the hunt.
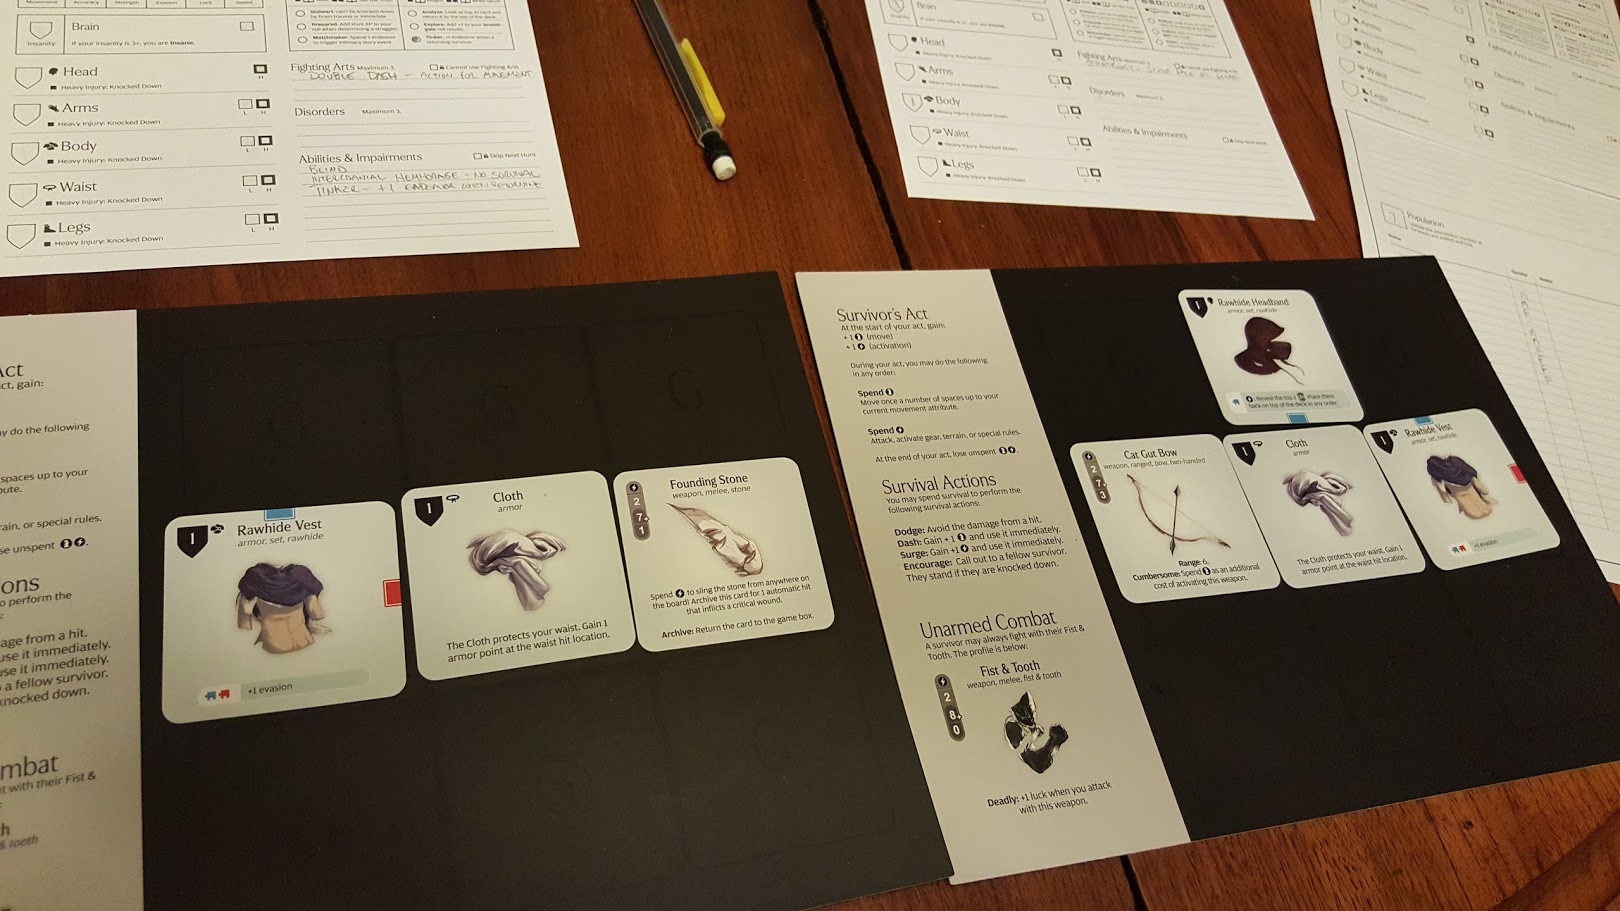
Similar to the last hunt, Cullen gets all the best gear. The permanent +1 STR bonus he gets means he has an easier time wounding monsters, and it’s one of the only positive traits any of my survivors have. Hokk gets some decent stuff, Naori gets her bow, and Jennissa gets the shaft again. Honestly, she’s half-blind and can’t use Survival, and I just never have high hopes for her prospects of staying alive.
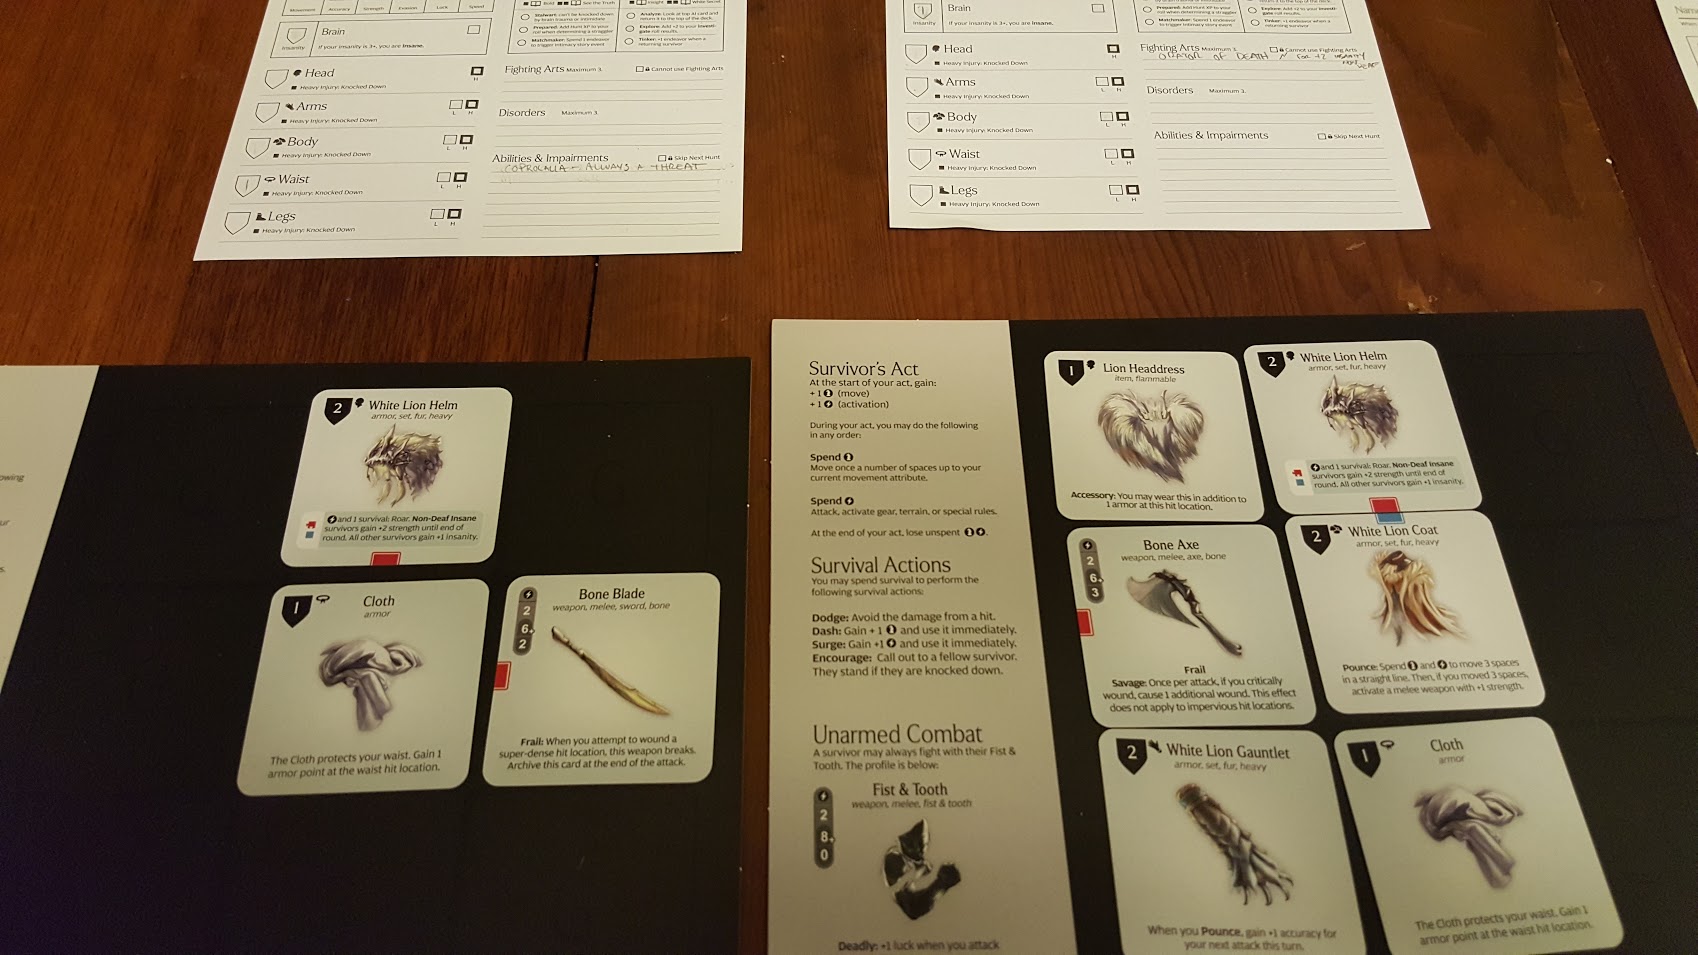
All of the departing survivors (except Jennissa) gain +1 Survival thanks to our Ammonia innovation. Cullen has an axe, so he selects to work on the axe proficiency, which means if he wounds the monster with an axe, and survives the hunt, he’ll be on his way to mastering the weapon.
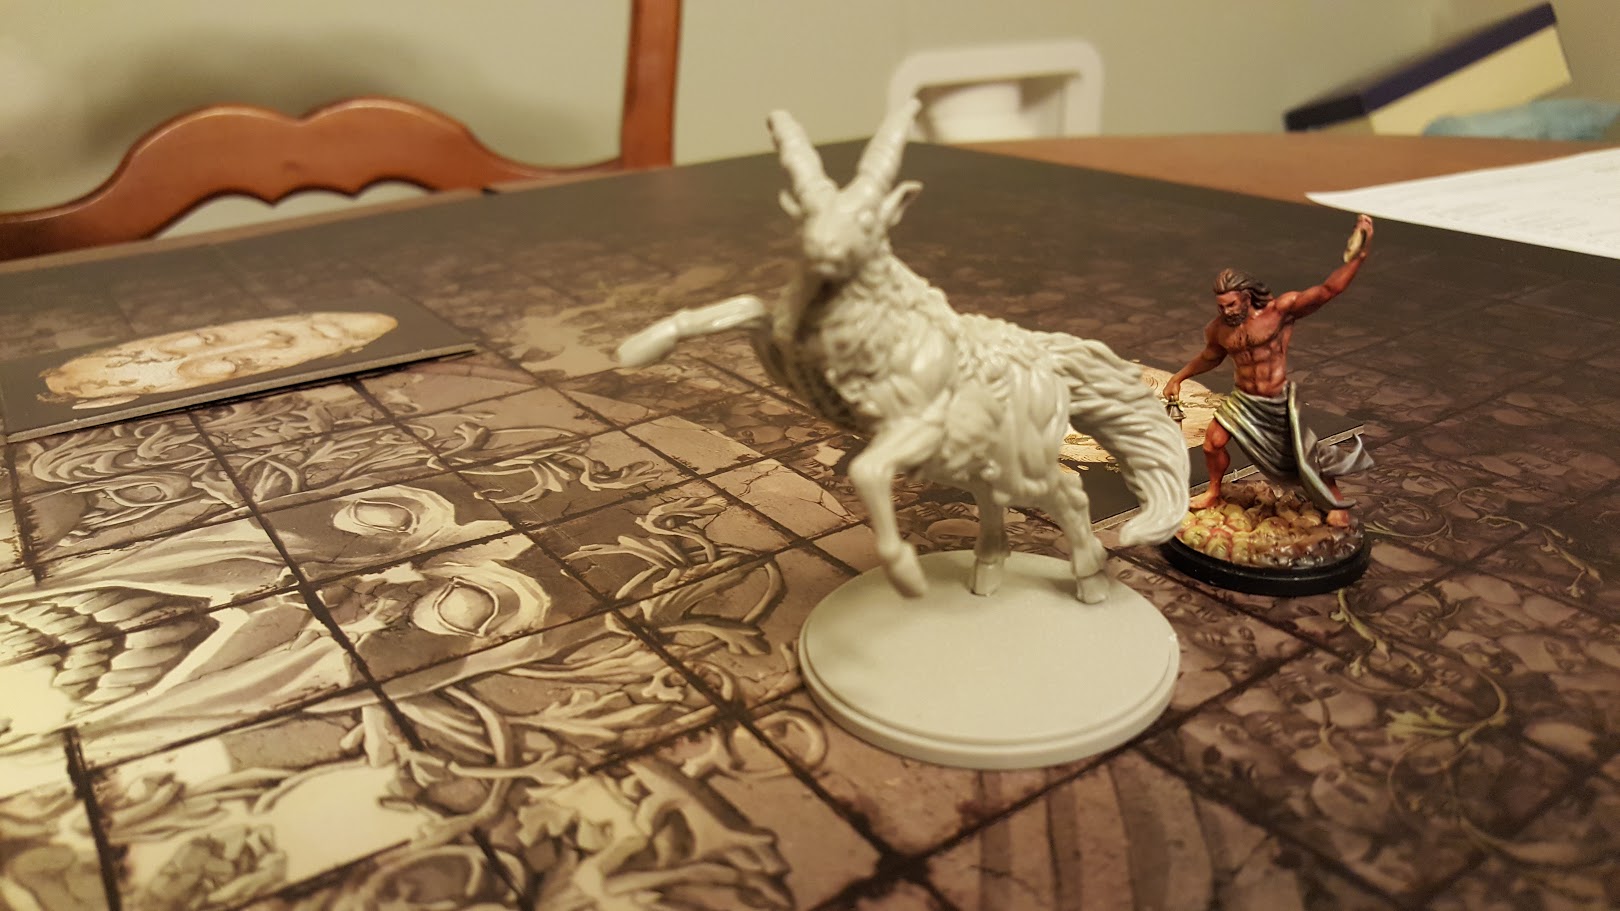
After facing White Lions for the past few hunts, this time I decide to set out after the recently discovered Screaming Antelope. I set up the Hunt Track.
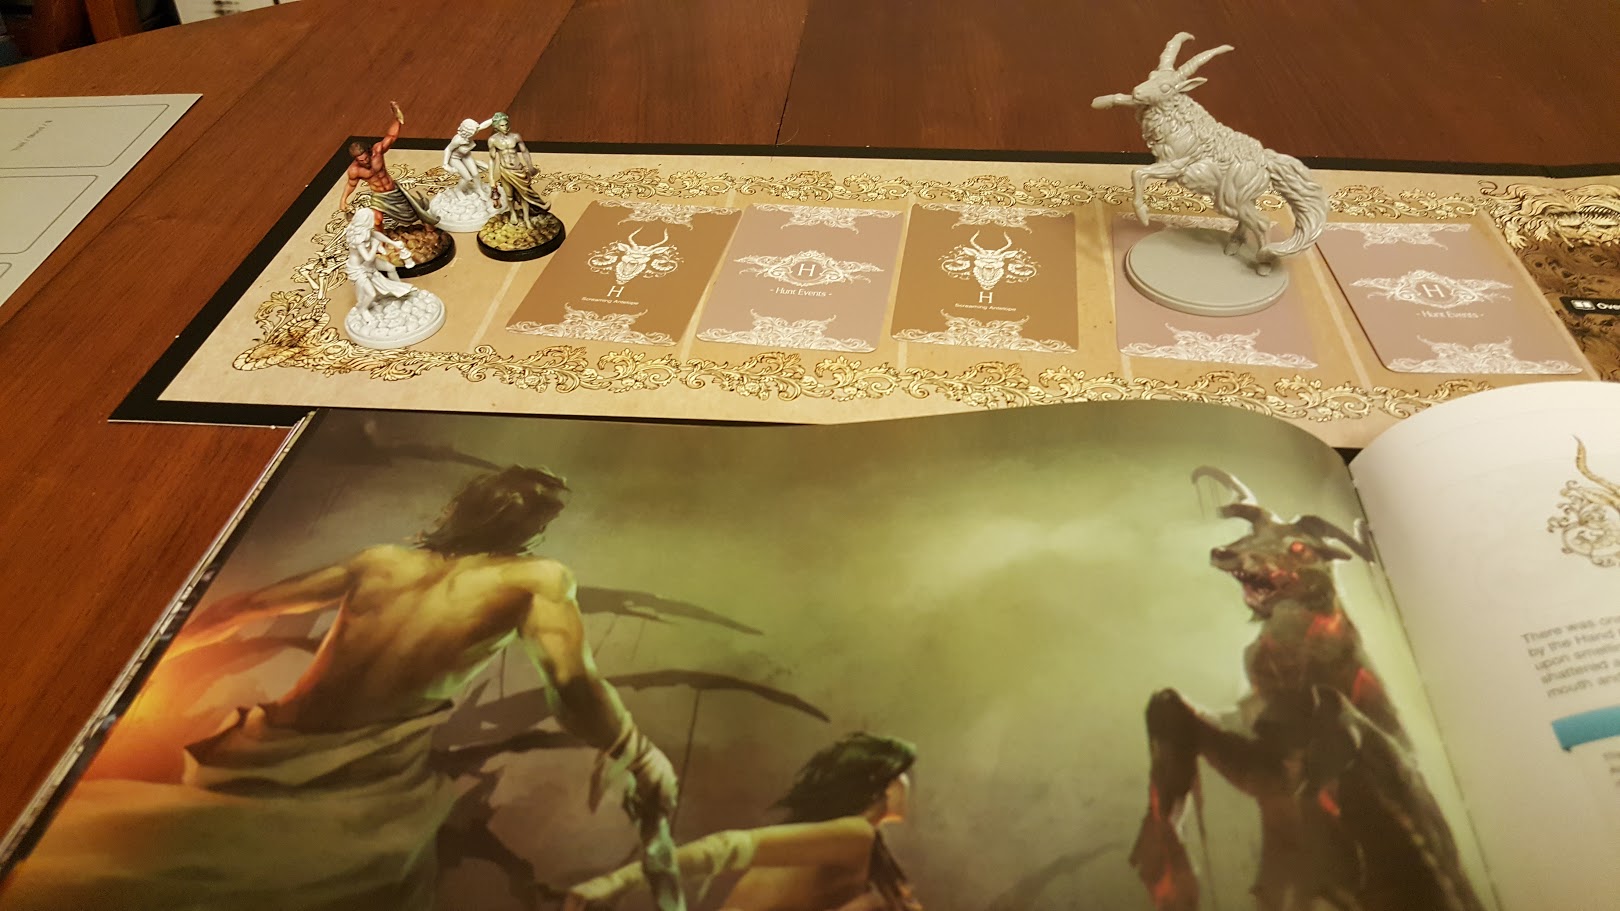
The hunting party moves into the first space, and flips over the card. Migration.
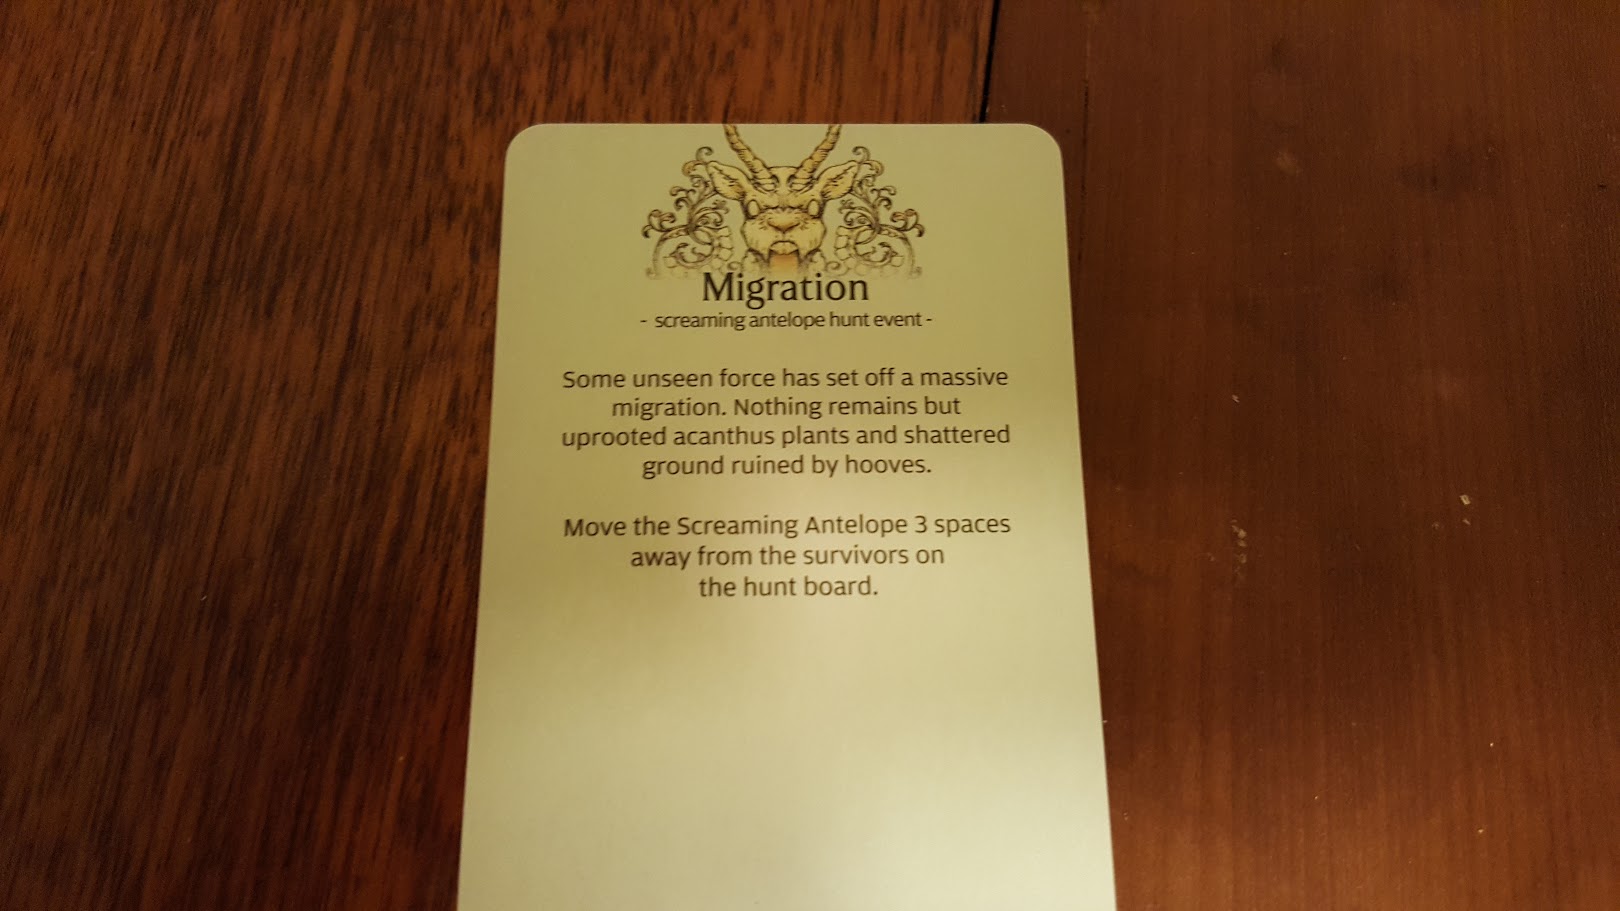
Ugh. The Antelope moves further away, meaning the party now has to endure more Hunt events to reach it, including passing over the Overwhelming Darkness space, a first for our civilization. They move to the second space, a regular hunt event, and roll a 24 on the Hunt Events table: Food from the Mouths of Others.
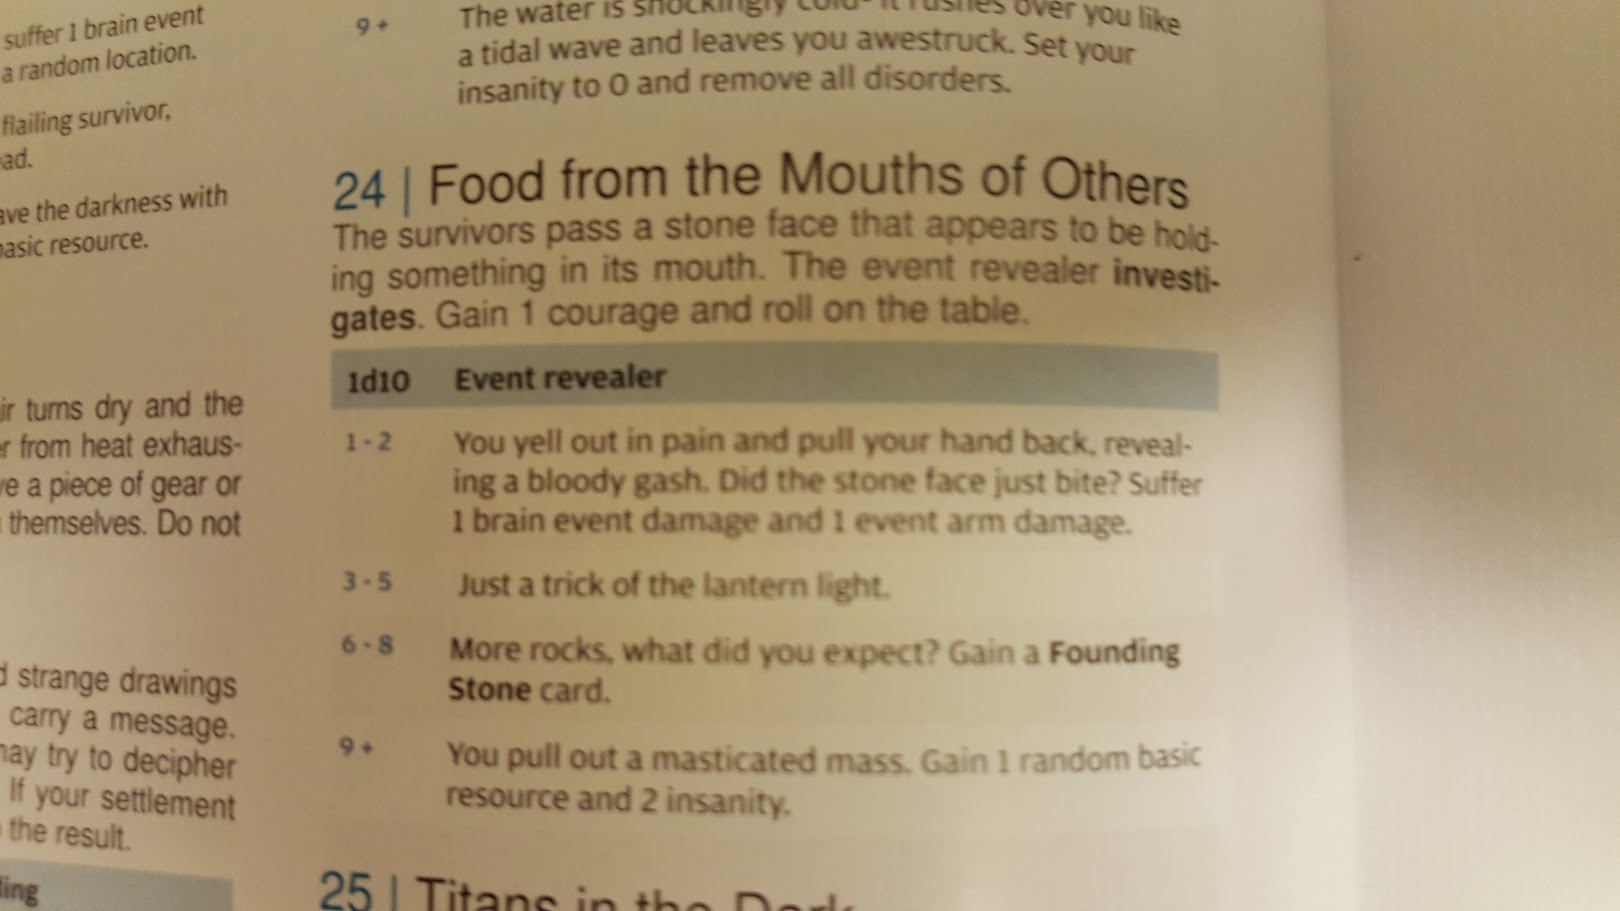
Jennissa investigates, and gains +1 courage. She rolls a 2, suffering 1 brain damage and 1 damage to her arms. Her courage gain triggers the Bold event.
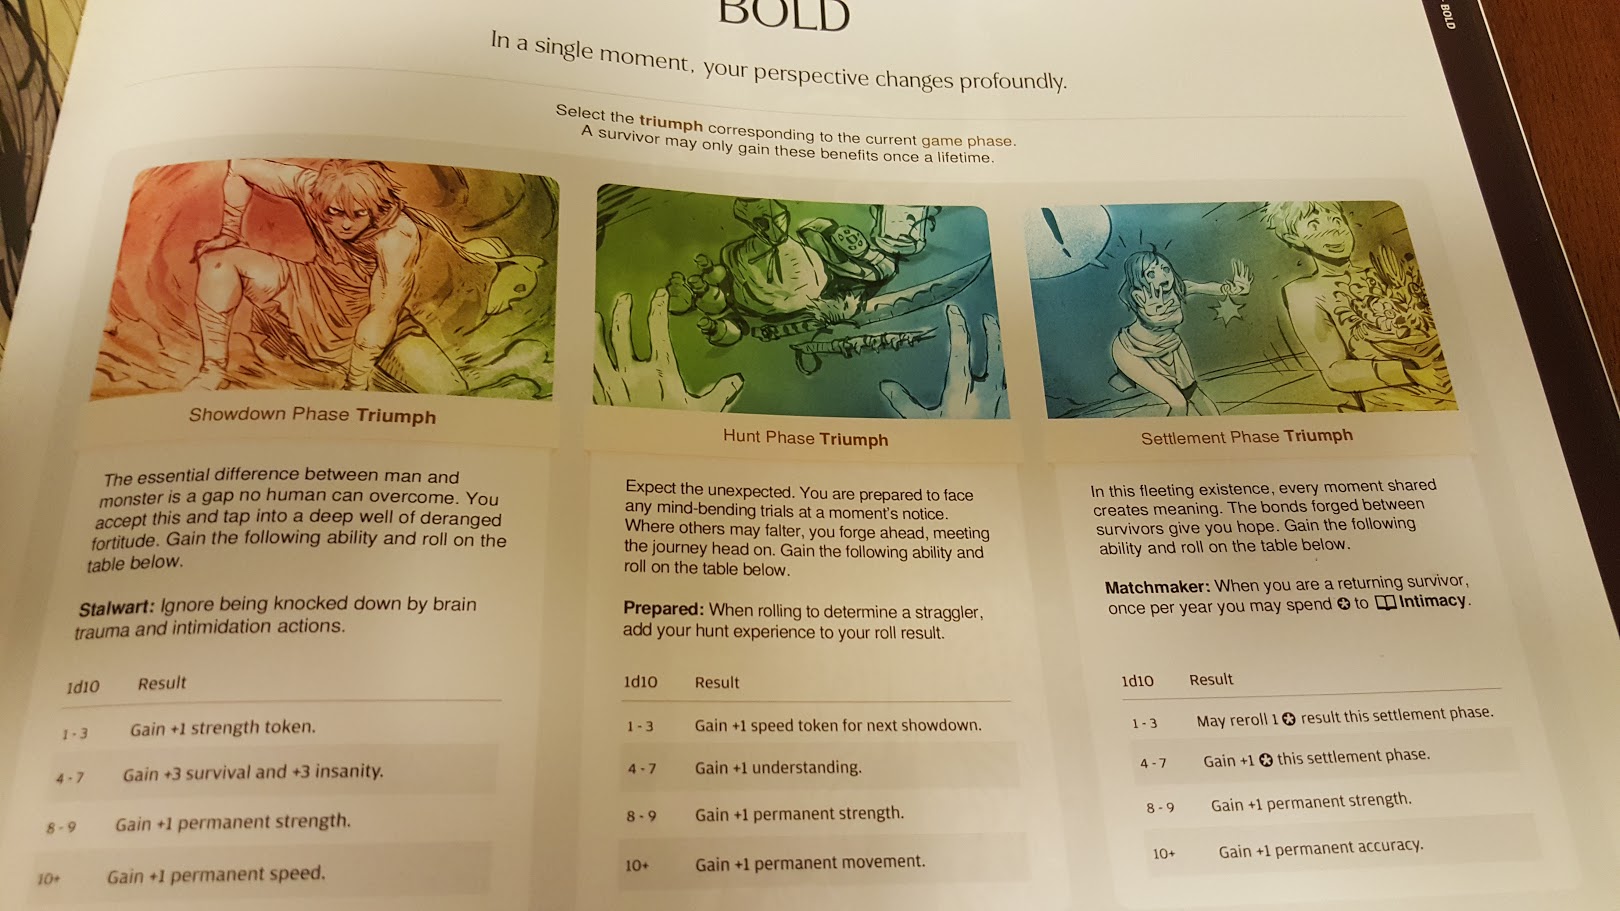
As we’re in the Hunt Phase, she rolls on the Triumph table. A 2 nets her a +1 Speed Token for the upcoming showdown, and the Prepared ability. To recap, Speed is not the same as Movement. Speed refers to how fast you are with a weapon, or rather, how many attacks you can make with a single “Action”. 2 Speed, the norm for most of the weapons carried by the party, means you roll 2 dice on the attack. With +1 Speed, Jennissa would now be rolling 3 dice. An extra chance to hit, and potentially wound.
The group trudges forward, drawing Carpet of Ticks.
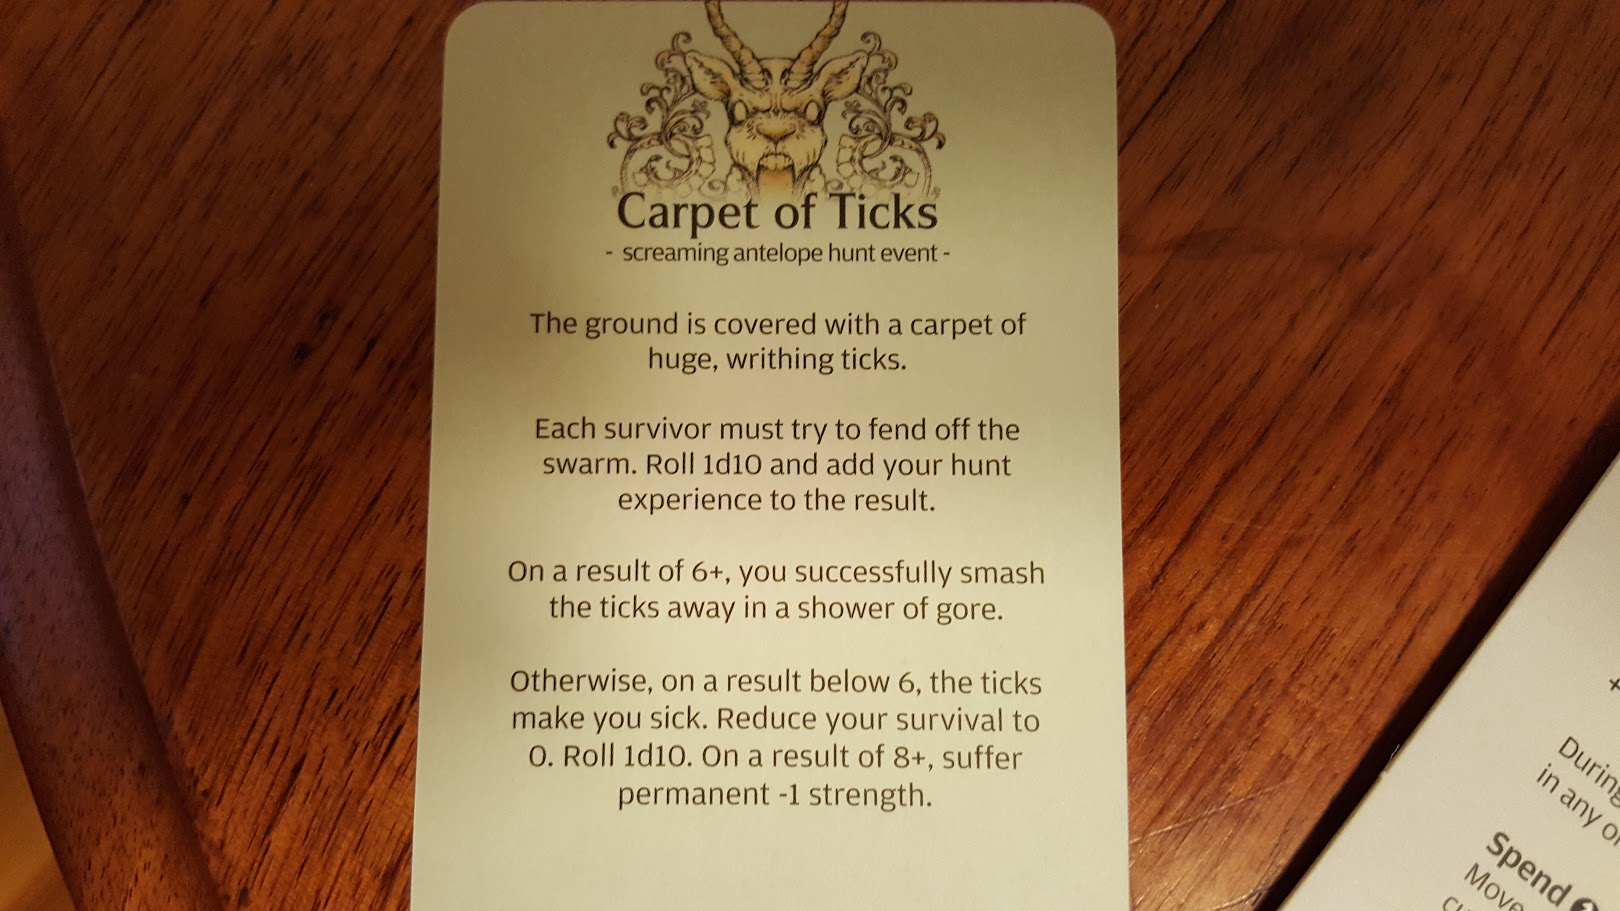
Cullen, Hokk and Naori roll high enough to squash the bugs. Jennissa gets sick, reducing her Survival to zero… but joke’s on you, ticks! She doesn’t get to have/use any Survival! She does manage to avoid losing a strength, though.
Our group presses on to the next space, a basic hunt event. Famine.
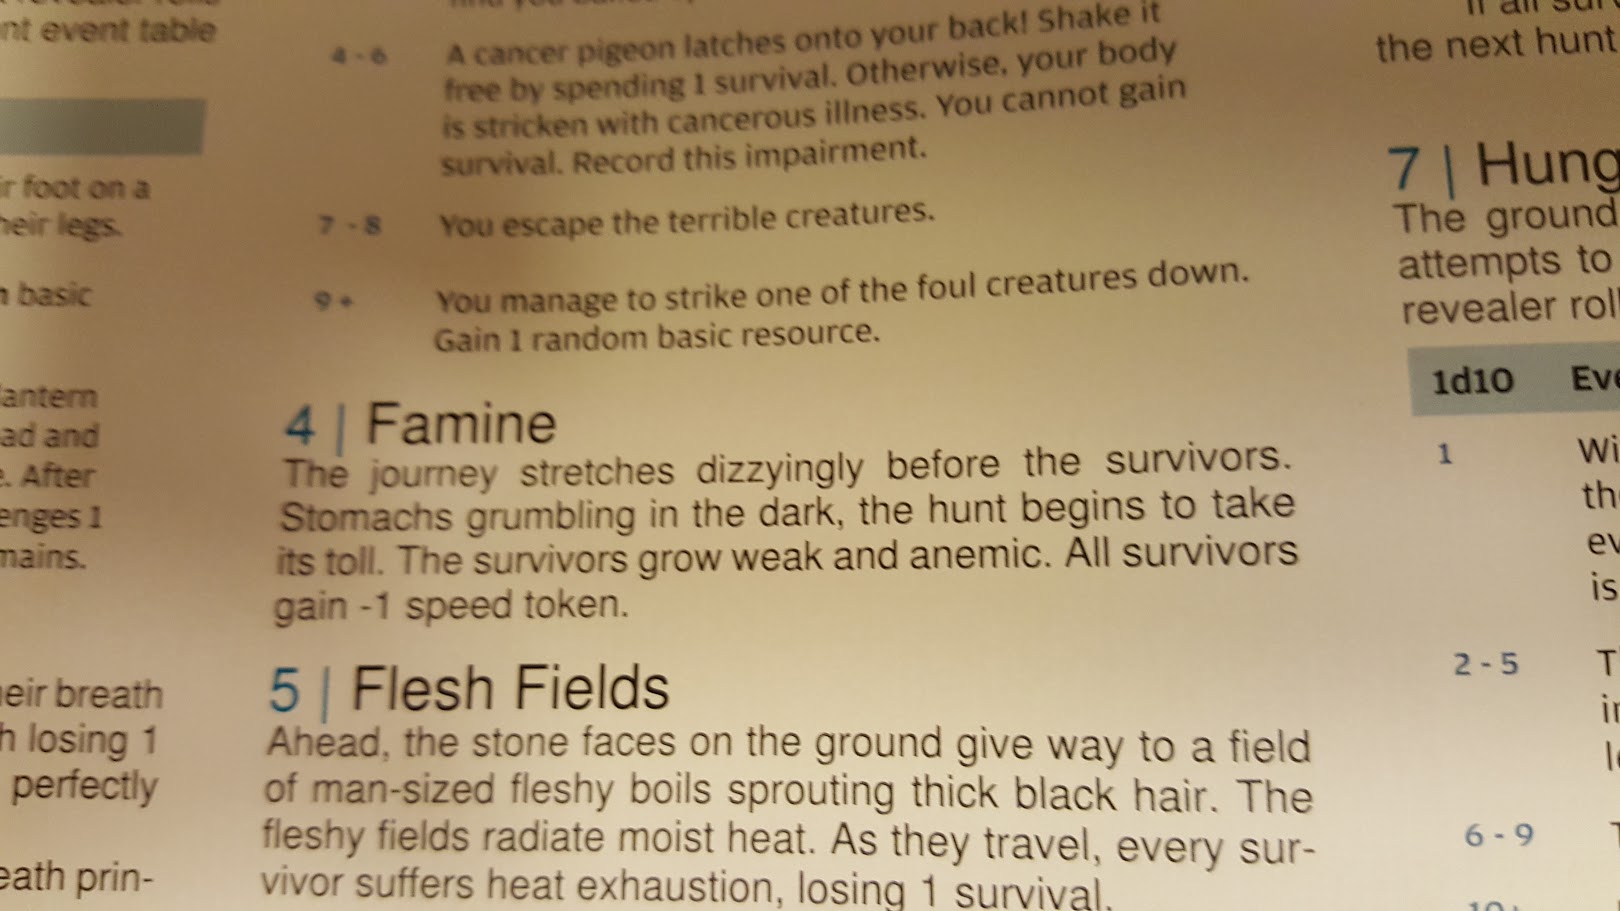
Ugh. This is awful. So remember how I just told you about how Speed works? Well now everyone is rolling 1 fewer attack dice. Jennissa breaks even, negating the bonus she just acquired, but everyone else is now only rolling 1 die on attacks. One chance to hit per survivor, per attack. Famine has just about halved my group’s total damage potential per round.
As if that weren’t bad enough, we step forward onto the next space and the ground under Naori gives way, revealing a massive pit.
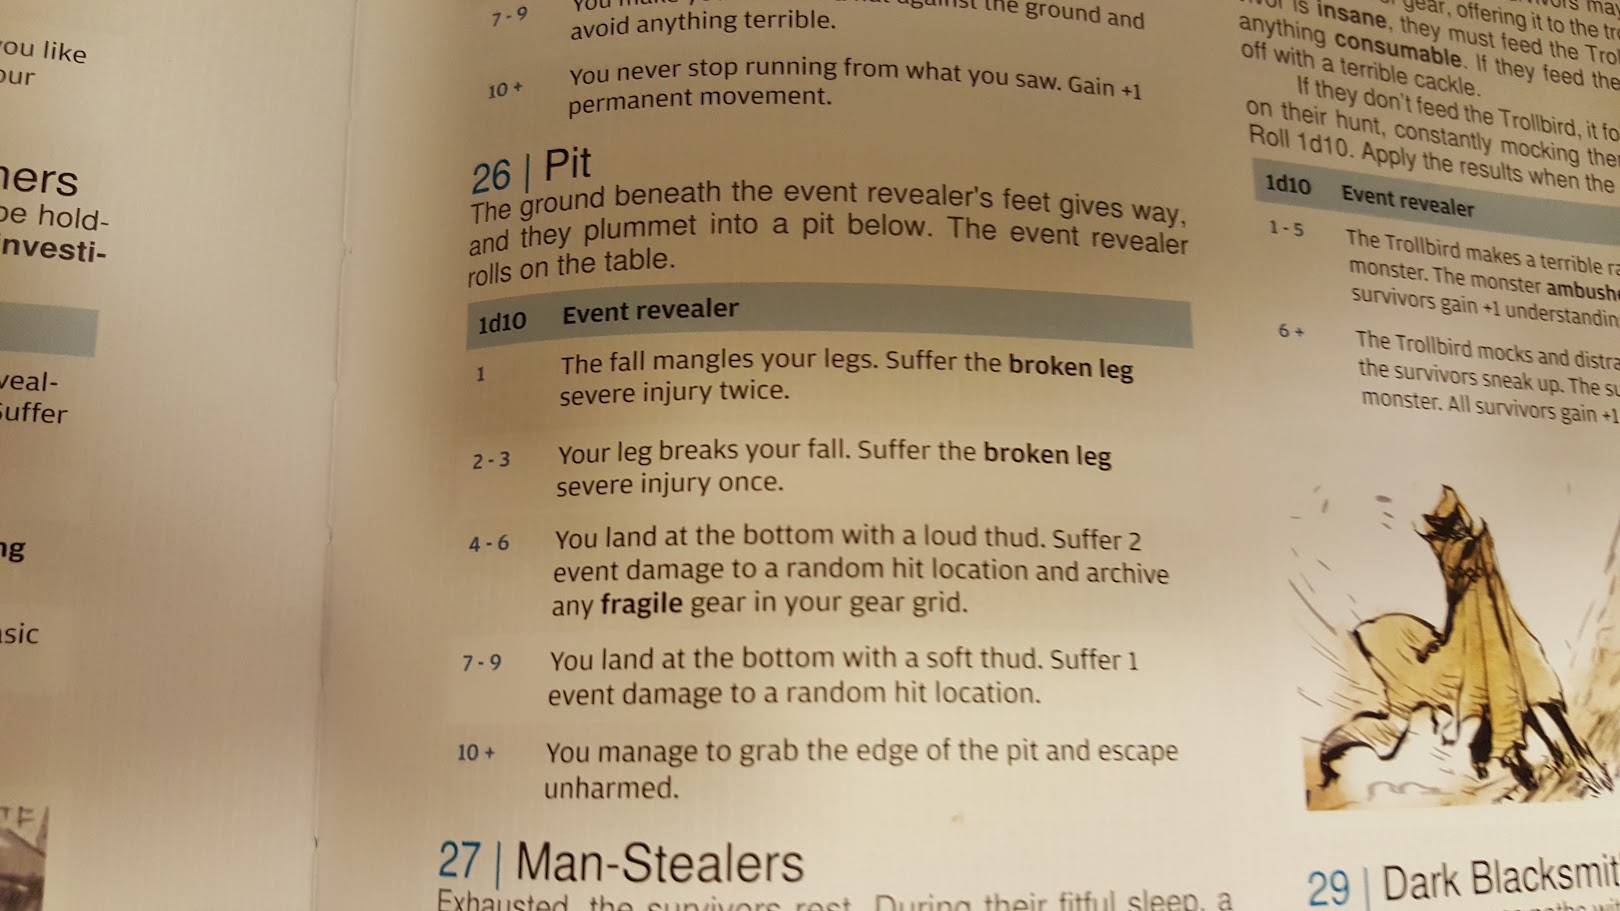
By some miracle, Naori rolls a lantern 10, grabbing onto the edge and sparing herself any further debilitating injury.
Next, we move into Overwhelming Darkness.
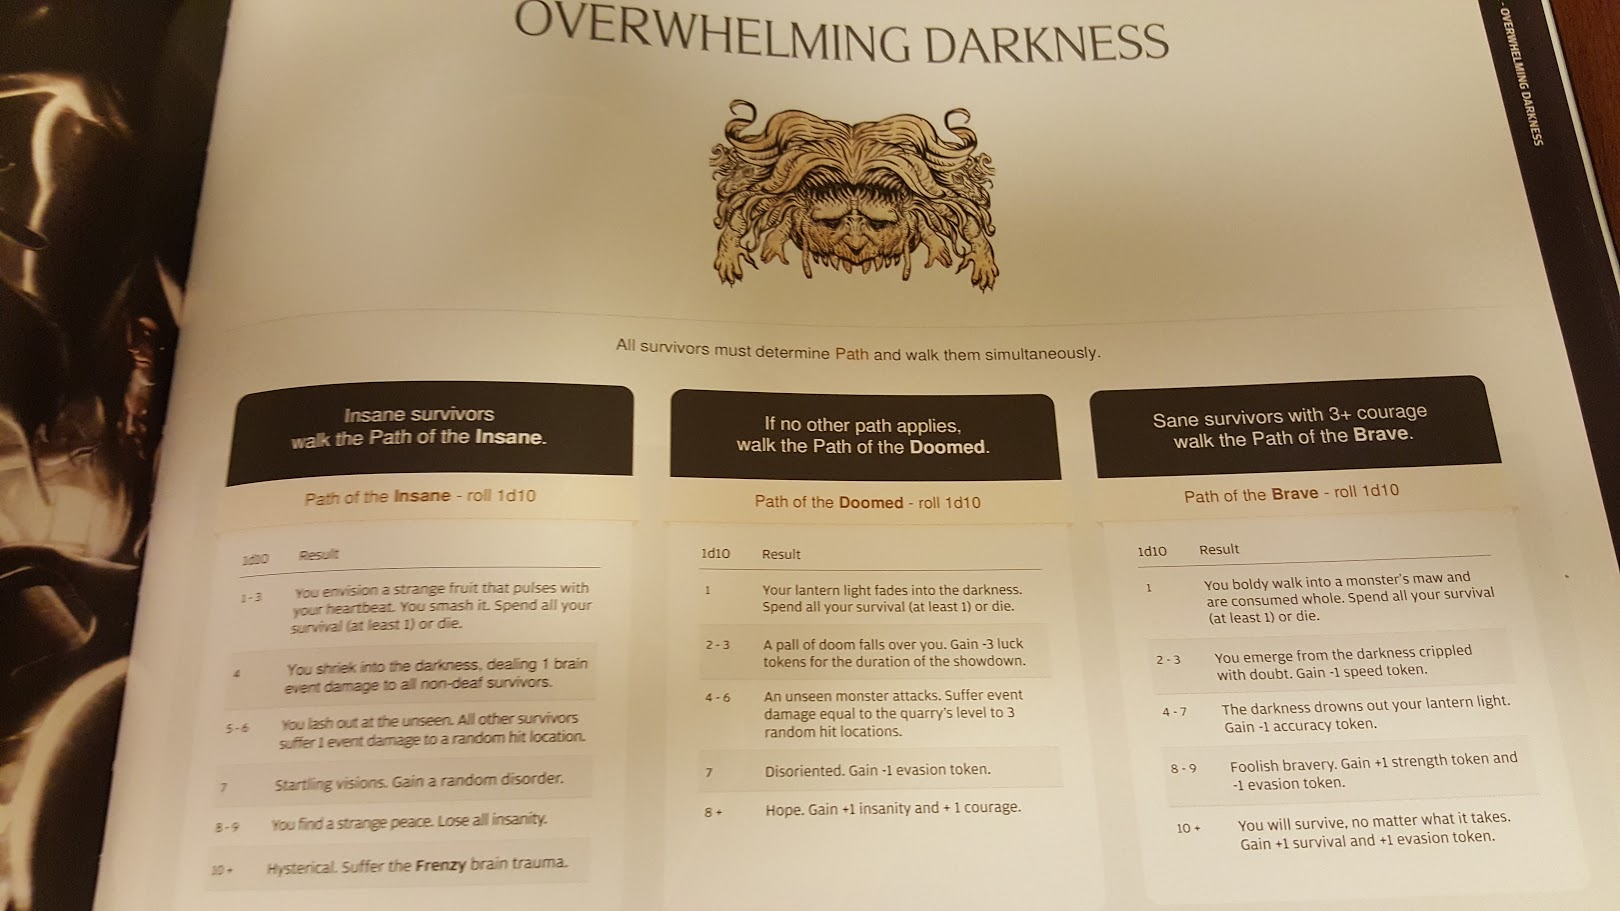
Hokk walks the Path of the Doomed. He suffers a wound to his head, body and legs.
Cullen walks the Path of the Doomed. He suffers -1 evasion, which will make him easier to hit.
Jennissa walks the Path of the Brave thanks to her recent courage gain. She receives a -1 accuracy token. Combined with her missing eyeball, Jennissa is at -2 accuracy. My only survivor rolling 2 dice per attack now has an even harder time hitting her target.
Naori walks the Path of the Insane, and loses all of her insanity.
We move into the next space containing the Screaming Antelope, and the Showdown Phase begins.
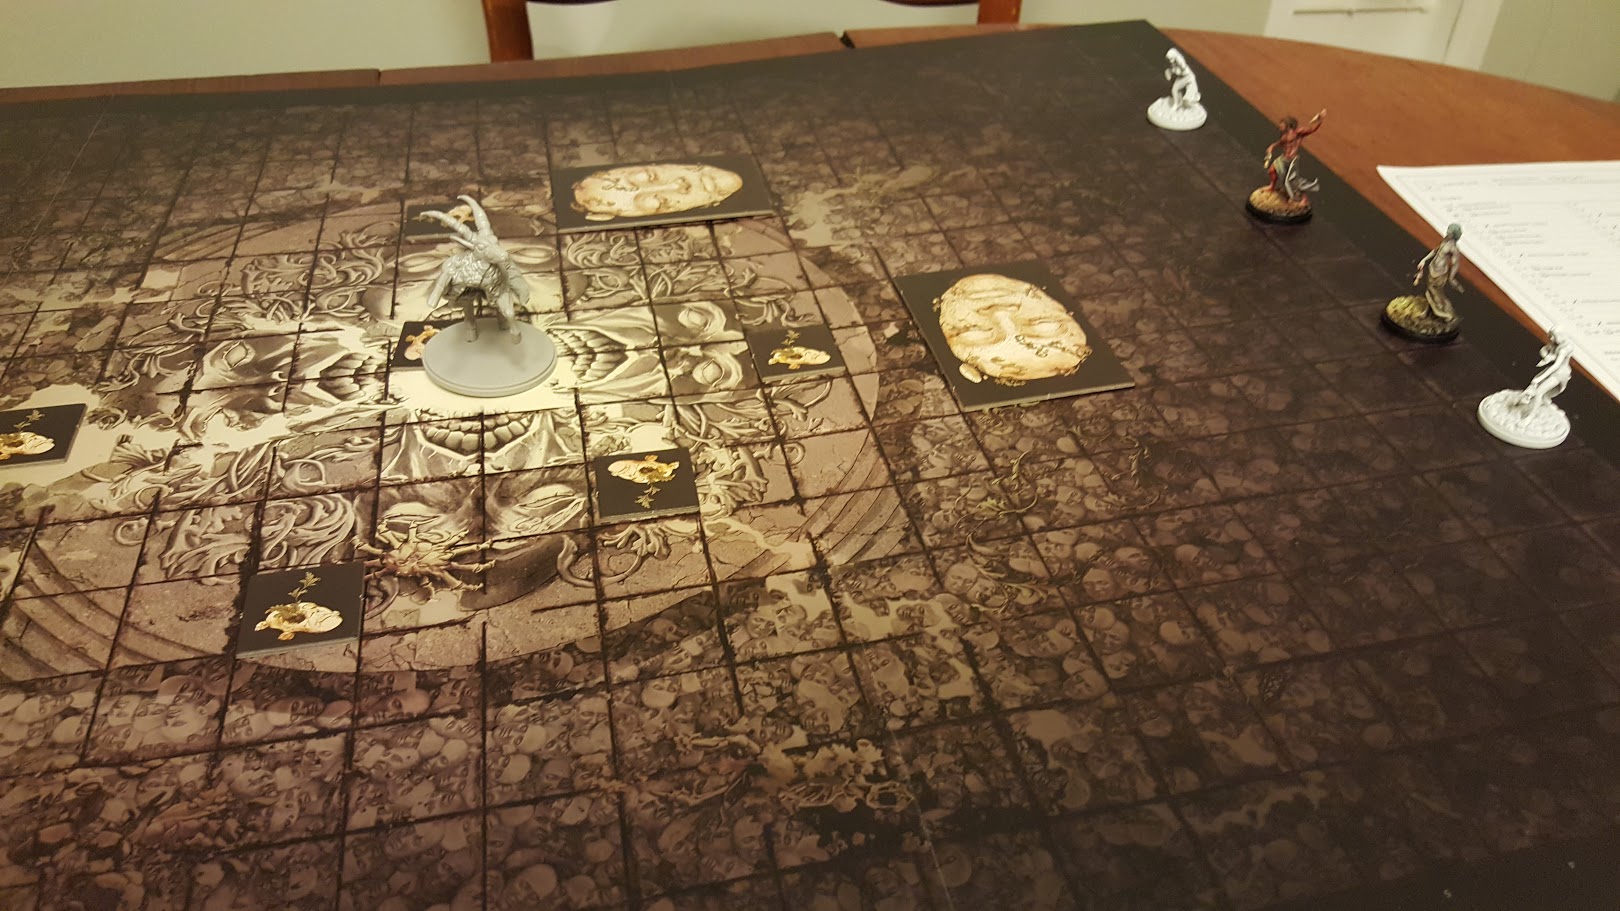
I set up the instructed/random terrain, including one addition Giant Stone Face thanks to Naori’s Strategist ability. Build the random AI deck for a level 1 Antelope, and place my hunters in their starting position.
The Antelope goes first, drawing Gore.
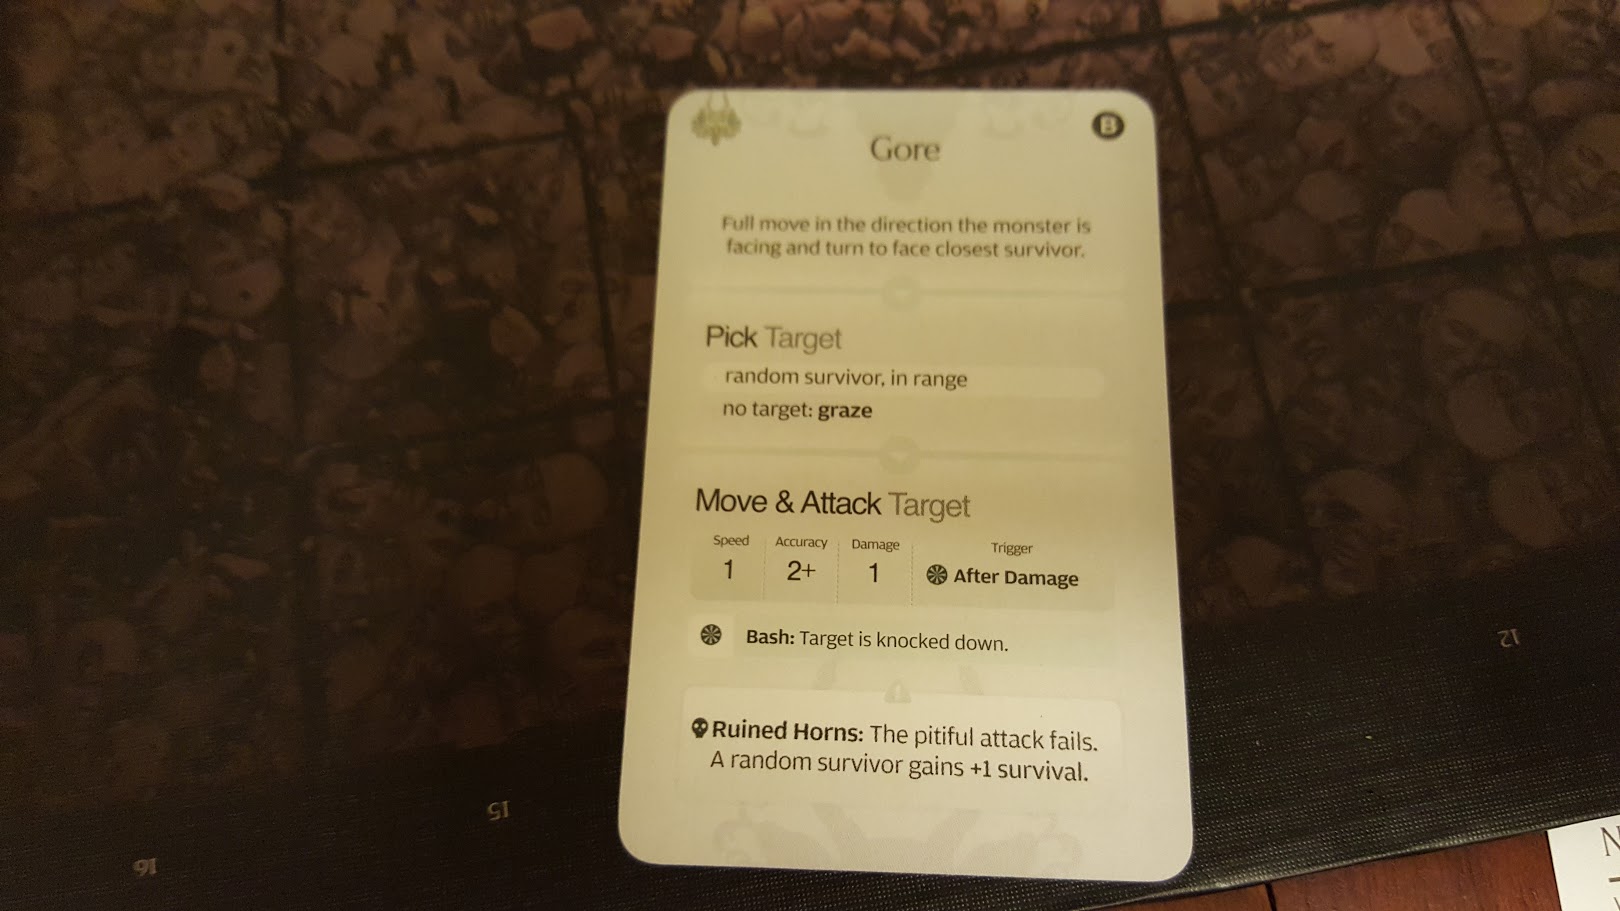
It charges forward in a straight line, and then turns to face the humans. None are in range, so instead it Grazes. Moves to a nearby Alcanthus plant and eats it. This would restore 1 health if it had been damaged at all. It hasn’t so the plant does nothing.
Naori, Jennissa and Cullen move up, Hokk climbs one of the stone faces.
The Antelope draws Chow Down.
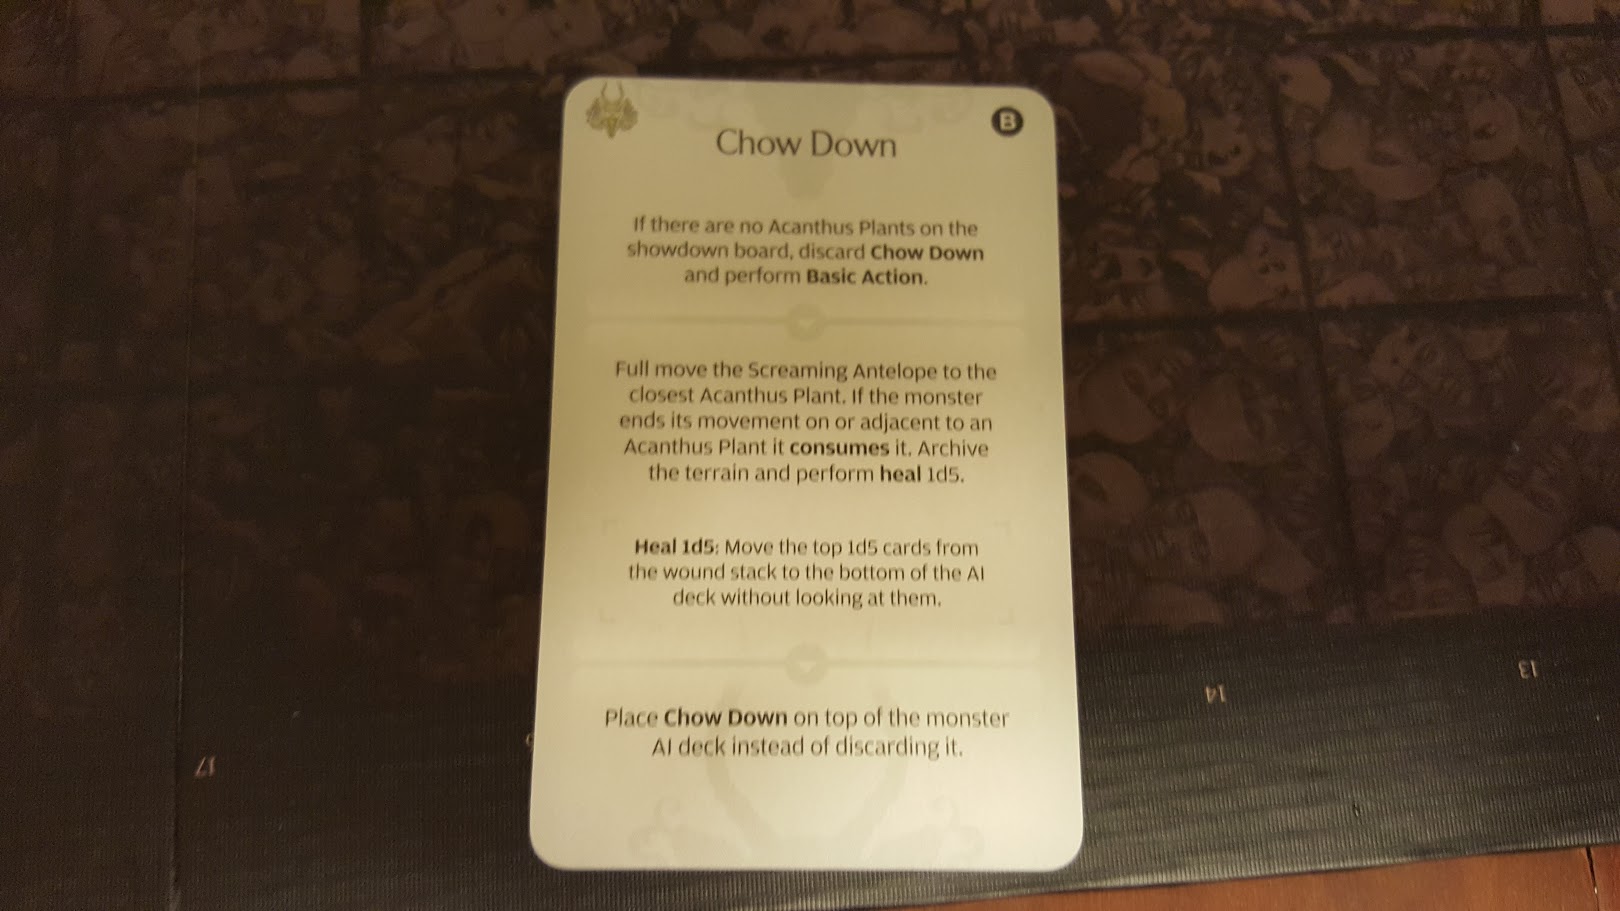
It moves and eats another plant, and again the heal does nothing. As instructed, Chow Down is placed on top of the AI deck to be drawn again next turn.
Everyone is still out of range to attack, so they advance further. Naori climbs a stone face and readies her bow.
Chow Down is drawn again. Another useless plant is eaten. This gluttonous ungulate is more interested in stuffing its face than paying attention to us. That’s fine with me.
Naori takes her shot, but it goes wide. Hokk moves in for an attack, rolling his single die and comes up with a lantern 10. He attempts to wound the creature’s Restless Tiny Hands.
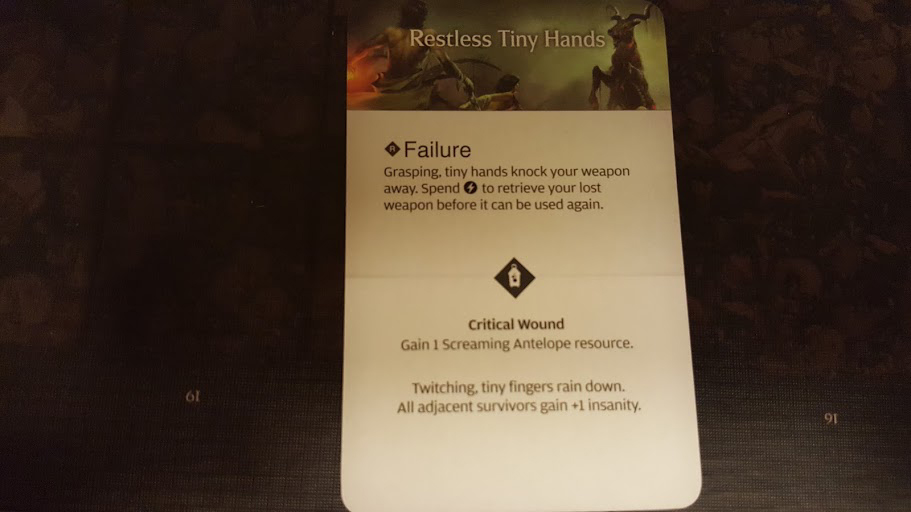
He fails, and the tiny hands bat his sword away, and it clatters to the ground. Cullen and Jennissa move up, unable to reach their prey this turn.
The Screaming Antelope draws Stomp and Snort.
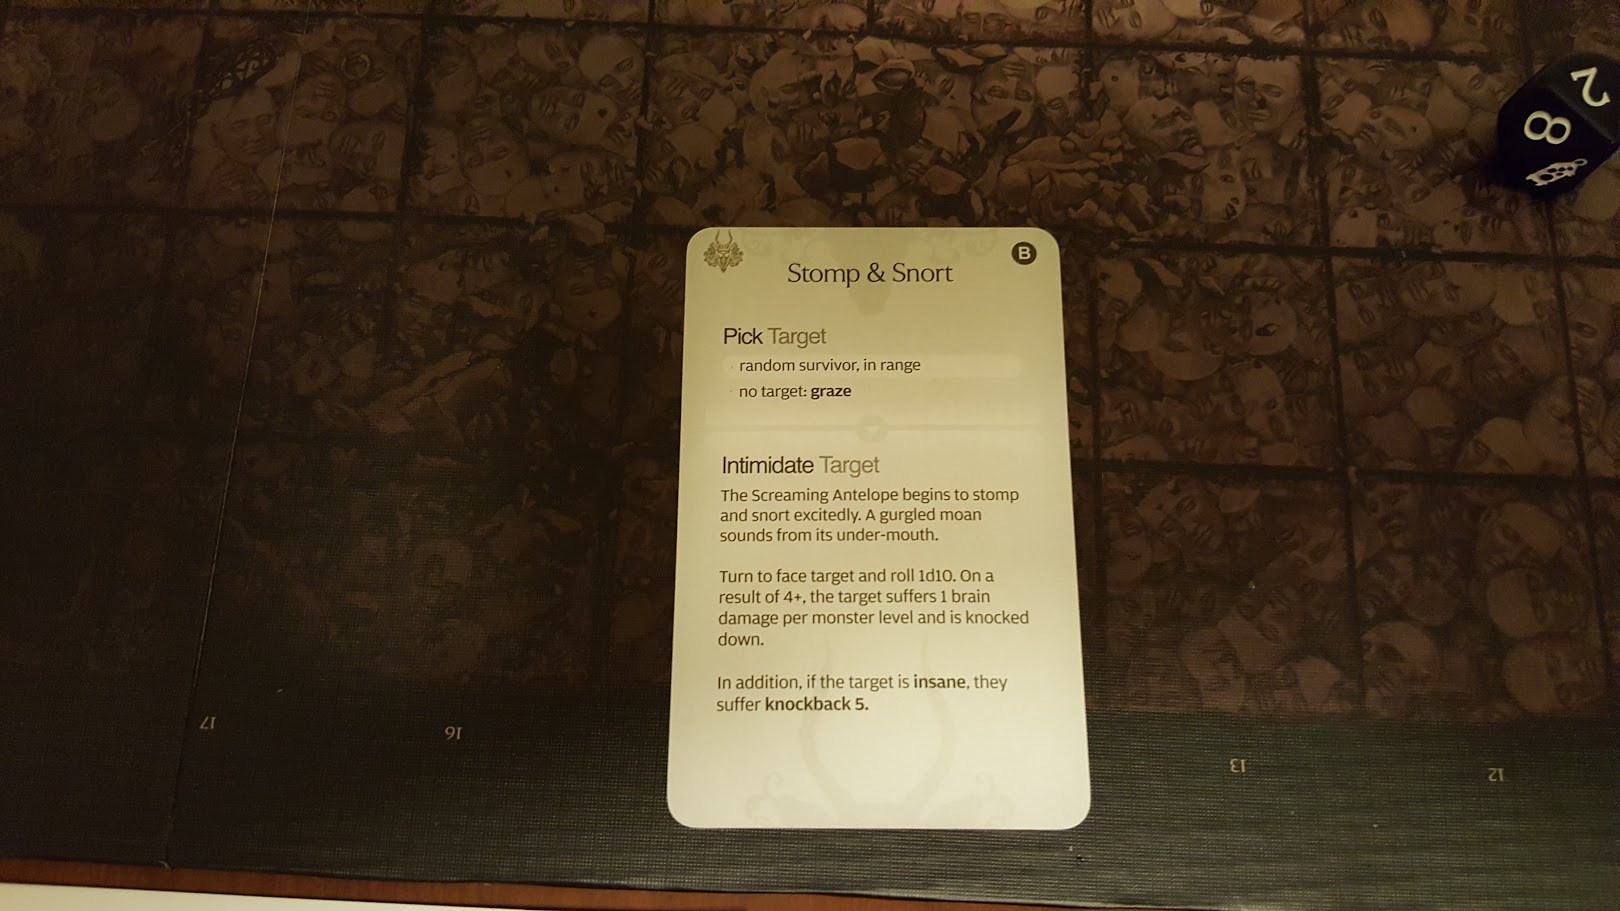
Hokk is randomly targeted, and successfully intimidated. He suffers 1 brain damage and is knocked down.
Naori shoots again, misses again. Dammit Naori.
Cullen makes his first attack of the hunt… and misses. Jennissa moves up and, thanks to her -2 accuracy, misses.
The Antelope draws Great Kick.
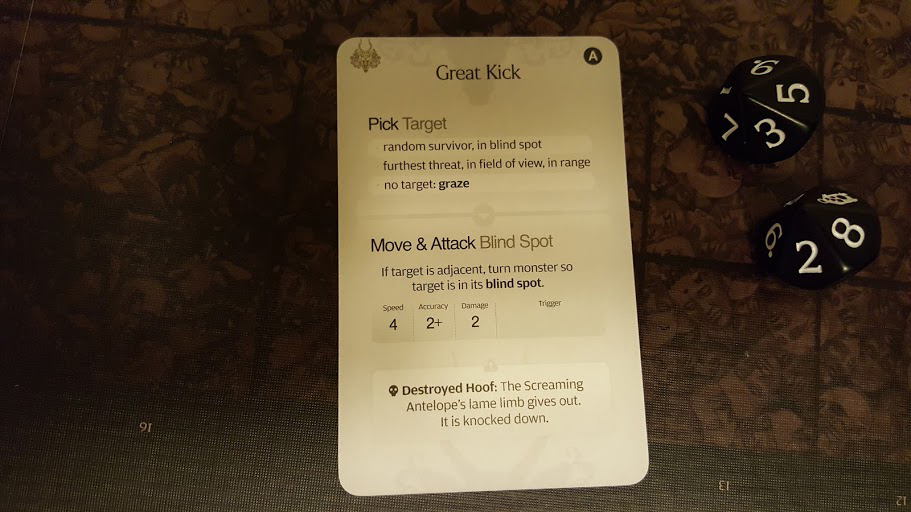
Naori is selected as the target, and the Antelope charges towards her, colliding with Jennissa in the process. She’s knocked to the ground. The beast turns and, rolling a whopping 4 dice, blasts Naori with a powerful kick attack. Three of the dice hit, causing each causing 2 wounds to her Chest, Chest and Legs. Naori spends a survival to dodge one of the hits to her chest, but still takes the other wounds to her chest and legs. She’s knocked down from the heavy damage.
The Antelope’s turn ends and Hokk stands up. He spends his action to pick up his sword, and moves towards the monster.
Jennissa moves into the beast’s blind spot and scores 2 hits with double 9’s!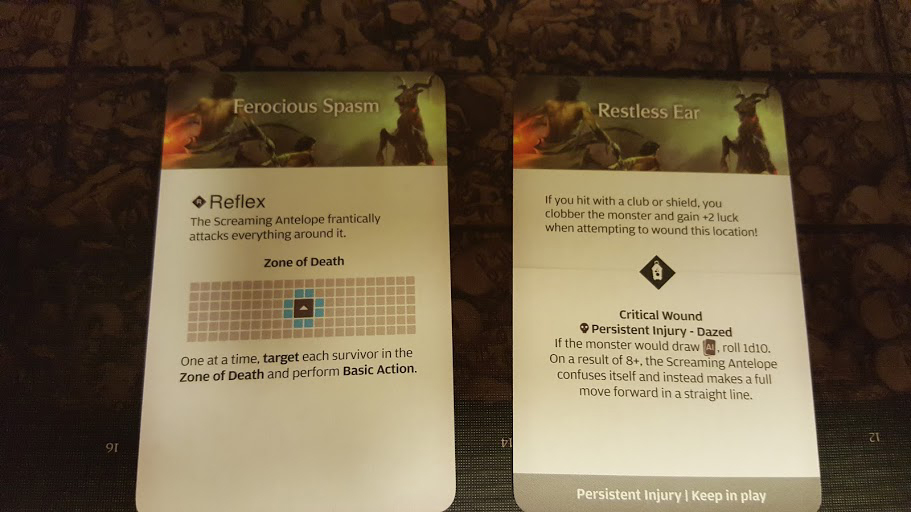
She wounds the Restless Ear, but cannot damage the Ferocious Spasm. The beast lashes out in return, thrashing at all adjacent survivors. Jennissa takes a wound to her chest, Naori 2 wounds to her waist, and Hokk a wound to his waist and head.
Cullen attacks, landing a hit and a wound on Restless Shank.
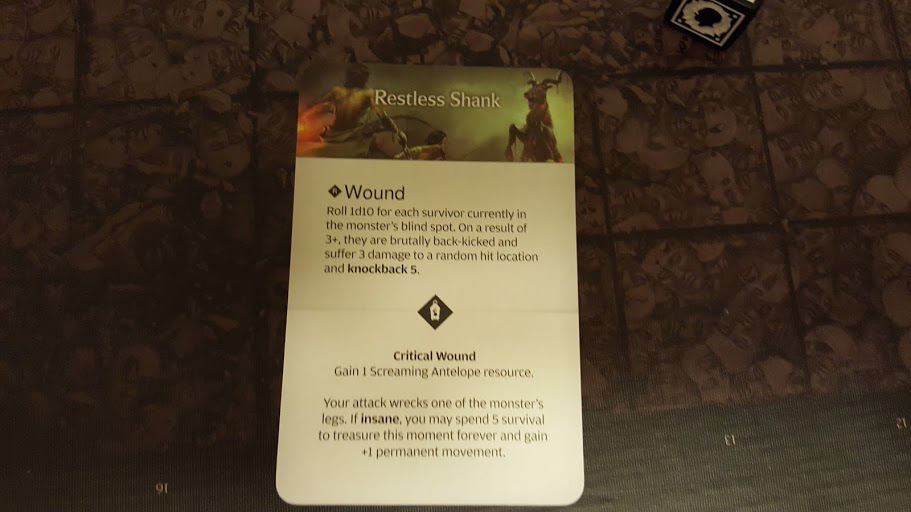
This causes the Antelope to kick backwards into its blind spot, right where Jennissa and Naori are. Both women are knocked back five spaces. Jennissa suffers 3 damage to her body, triggering a severe damage roll. A shard of bone has impaled her heart, killing her instantly.
Naori also suffers 3 damage to her body, but rolls a lantern 10 on severe damage, meaning she is only knocked down from the blow.
The Antelope starts its turn, drawing Stomp.
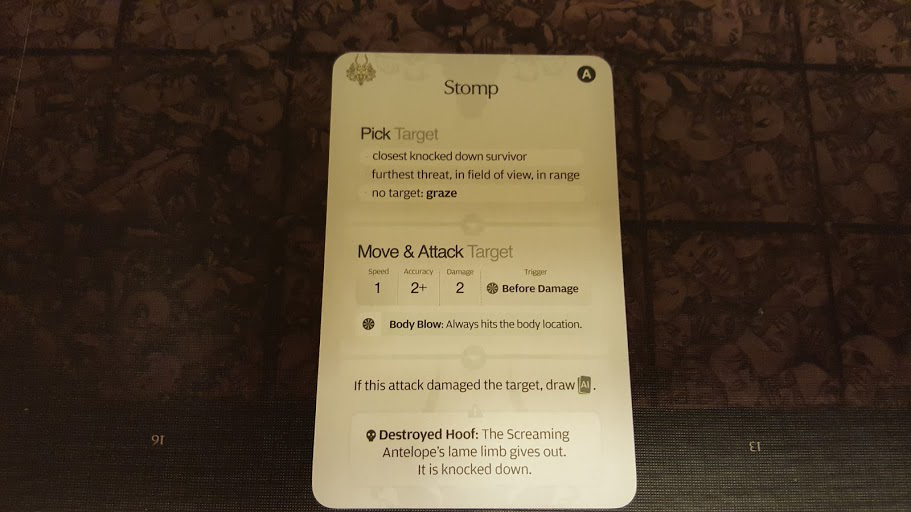
The closest knocked down survivor is Naori. The monster gallops over to her, causing 2 more wounds to her body, triggering another severe damage roll. With a sharp crack, her back is now destroyed. She suffers a permanent -2 movement, and can no longer use weapons that have 2 or more strength (ie, her bow). Since the attack caused damage, the Antelope draws another AI card. Slam.
Once again, poor Naori is the closest knocked down survivor. The Antelope again hits her in the fucking body, causing another severe damage roll. Naori pulls a lantern 10 for the second time, incredibly surviving the onslaught.
Cullen moves into the Antelope’s blind spot, but cannot land an attack with his one die. Hokk moves his way around the giant stone face in his path.
The Antelope draws Back Kick.
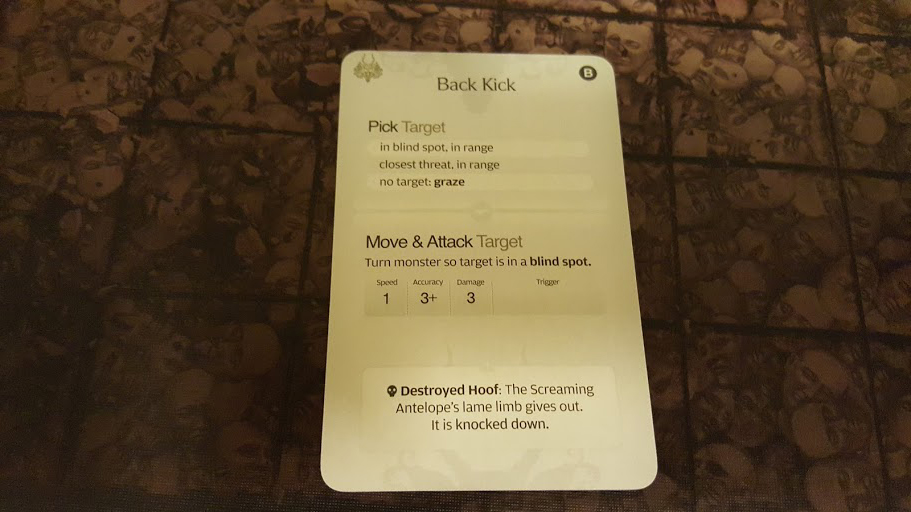
Cullen is in the beast’s blind spot, and takes 3 damage to his arms from the kick. His White Lion Gauntlets prevent the damage from reaching the Heavy location and knocking him down. Naori stands up (somehow).
No longer able to use her bow, Naori attempts to savages the Antelope with her fists and teeth, but misses. Hokk reaches the battle, attacking from the blind spot for the increased accuracy, and lands a wound on the Antelope’s Restless Inner Thigh. The monster now suffers -1 movement to boot.
Cullen makes his attack, and lands it… but it’s a trap!
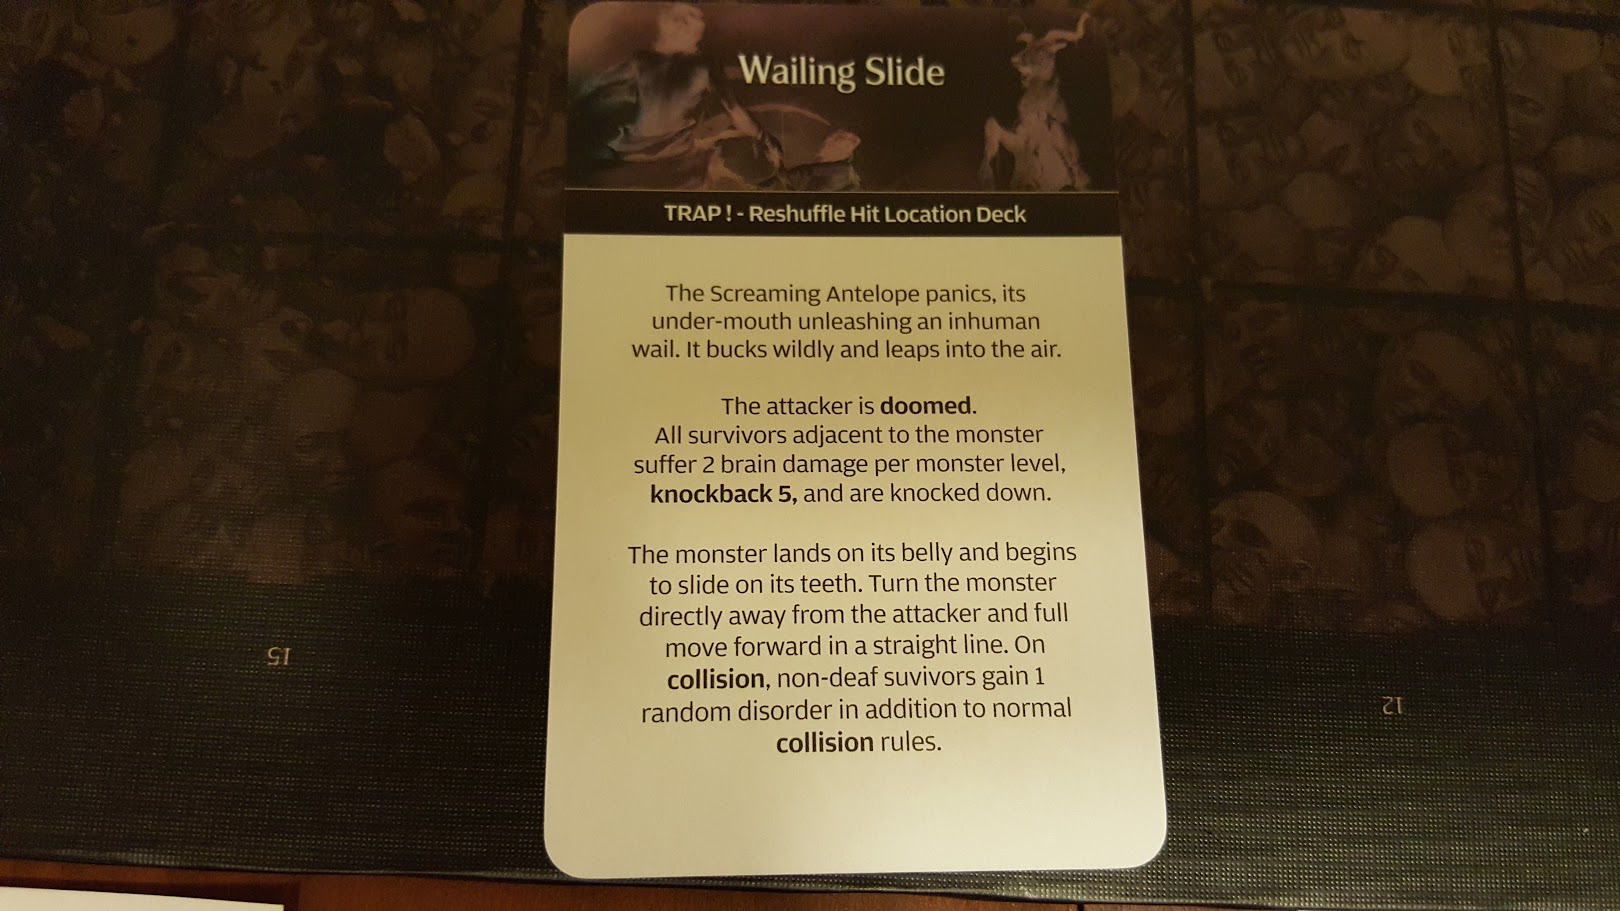
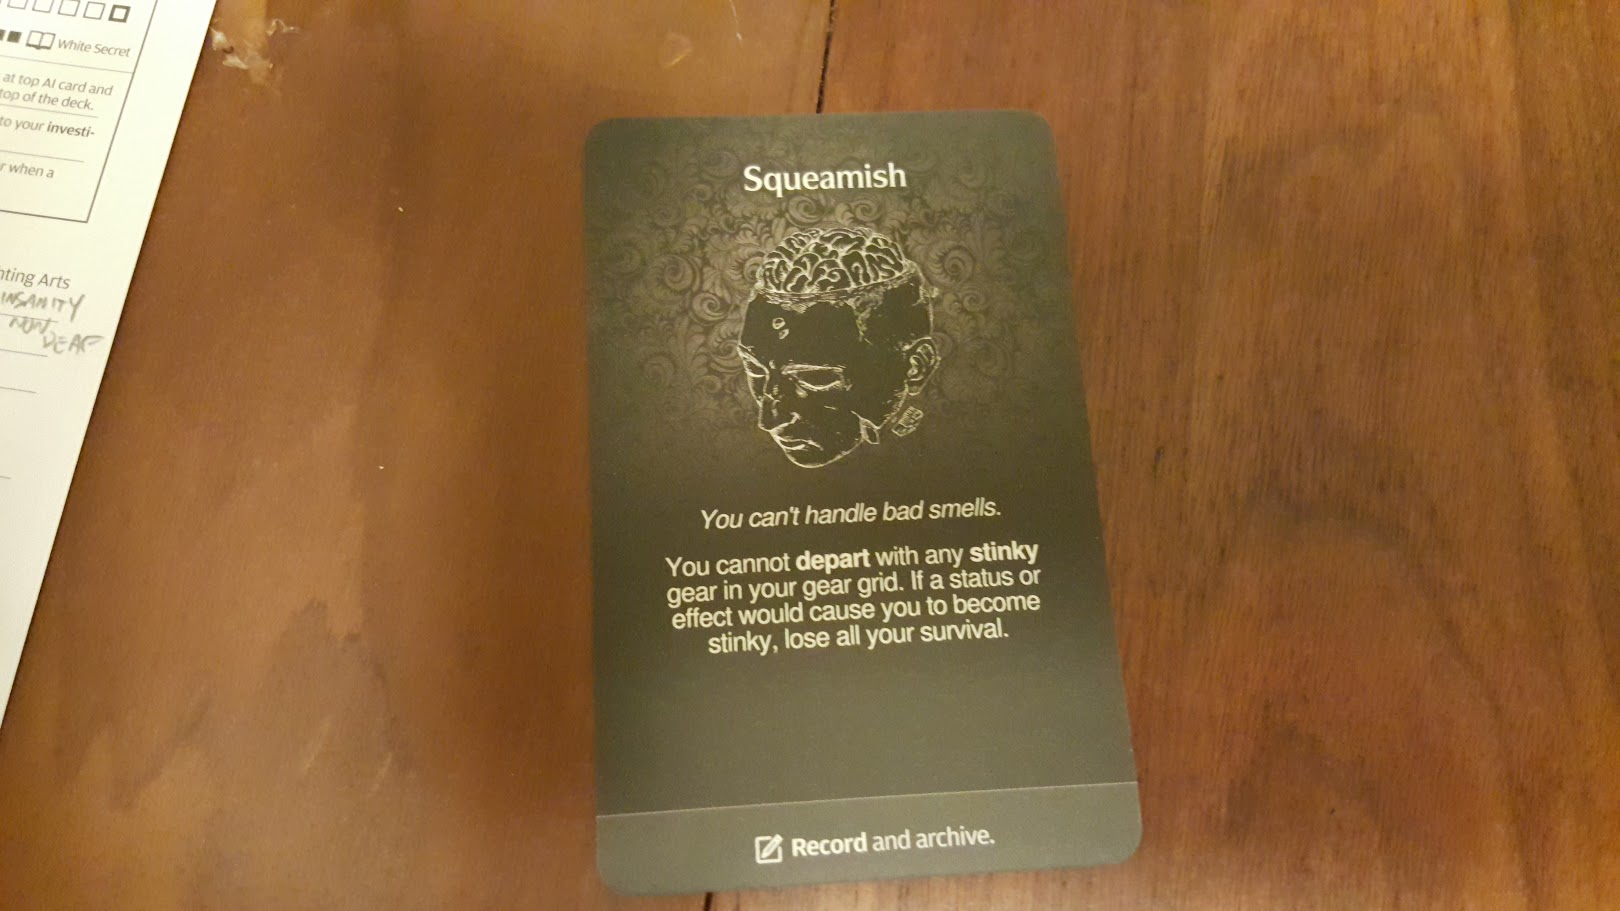
The Antelope thrashes violently. Cullen is knocked back 5 spaces, and suffers 2 brain damage. Naori is knocked back as well, and suffers brain trauma. She has a seizure, causing 1 damage to herself in the waist location, gaining 5 insanity and the Squeamish disorder. She’s also knocked down again.
Hokk is knocked back and collides with the giant stone face, knocking him down. He also suffers brain trauma, gaining 6 insanity.
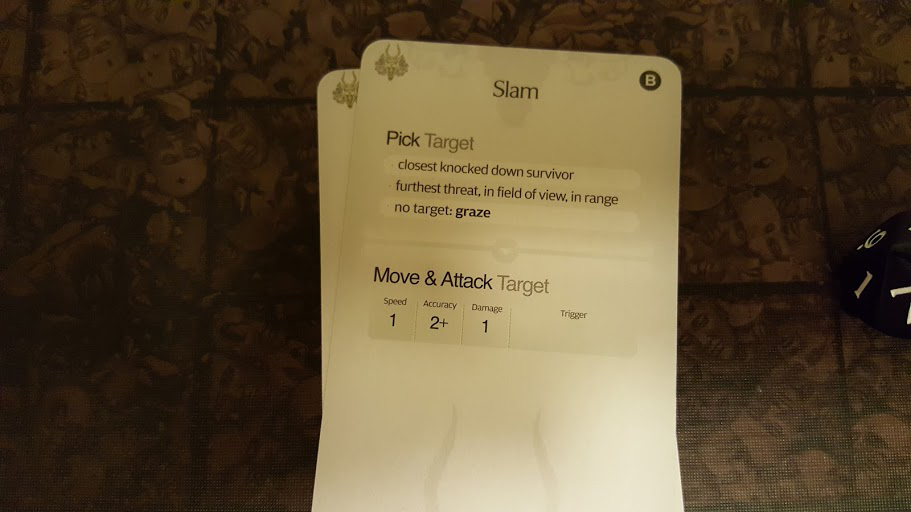
The Antelope draws Slam, targeting Hokk, but misses! Hokk and Naori stand up.
Naori, now with a movement of only 3, hobbles closer. Hokk circles into the Antelope’s blind spot, but misses his attack. Cullen hits and wounds the monster’s Restless Back.
Gore is drawn at the beginning of the Antelope’s turn. It moves forward, sending Cullen sprawling to the ground. It then turns and targets Cullen, landing 1 damage to his body.
Naori shambles a few spaces closer to the action. Hokk misses an attack.
The Antelope draws Chow Down, moving to a nearby plant and eating it. It heals 1 wound. Chow Down is placed on top of the AI pile, to be drawn again next round. Cullen stands at the end of the beast’s turn.
He moves forward and wounds the Antelope’s Restless Flank. The wound moves Chow Down off of the AI deck and into the wounds pile. The creature will not be chowing down any longer this showdown.
Hokk and Naori move closer.
The Antelope targets Naori with Stomp and Snort. She suffers a brain damage, but her recently acquired insanity protects her from another brain trauma roll. She is knocked back 5 spaces and knocked down.
Cullen slips into the Antelope’s blind spot again, and hits with his attack. He deals a critical wound!
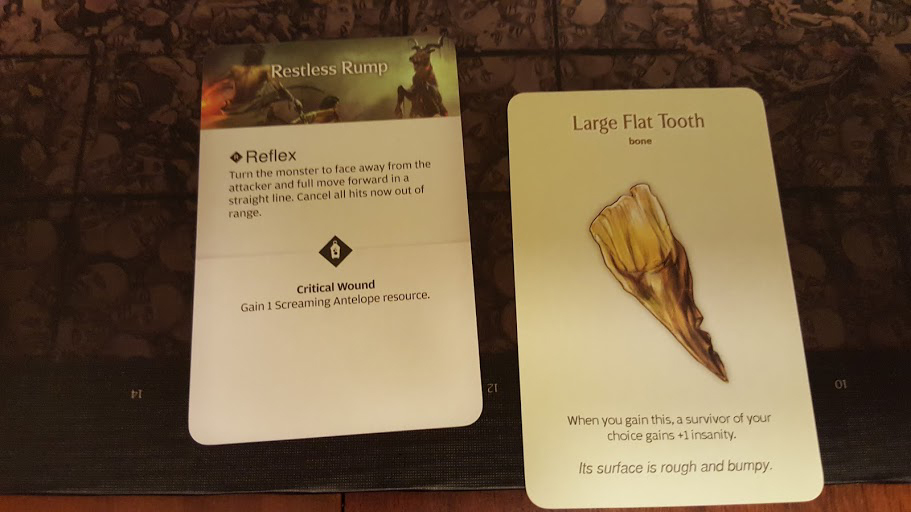
Due to his axe’s ‘Savage’ ability, the Antelope also takes 1 additional wound from the critical. Cullen gains 1 Large Flat Tooth and +1 insanity. The Antelope reflexes from the attack, charging forward in a straight line, slamming into Naori. She is knocked back another 5 spaces.
Hokk moves closer to the Antelope.
The Antelope activates and draws Stomp. Naori, being the closest knocked down survivor, is the target. The attack deals 2 damage to her body. She rolls a 1 on the severe damage table, and she is killed instantly. The attack caused damage, so the Antelope draws again; Back Kick. It runs over to Hokk and delivers a devastating 3 wounds to his waist. He also rolls a 1 on the severe damage table, and dies outright. Cullen is the last survivor alive.
He moves forward and misses his attack. Great.
The Antelope draws Slam, dealing 1 damage to Cullen’s body.
Cullen lands an attack on the beast’s Giant Teeth. He wounds, but because it’s a ‘Super Dense’hit location, his frail bone axe shatters. He is now unarmed.
Stomp and Snort directed at Cullen, but the Antelope fails to intimidate the mighty hunter.
Cullen dashes into the monster’s blind spot, attacking with fist and tooth, but landing no hits.
The Antelope draws Stomp, but cannot see Cullen in his blind spot, so it Grazes instead, moving away towards the closest plant.
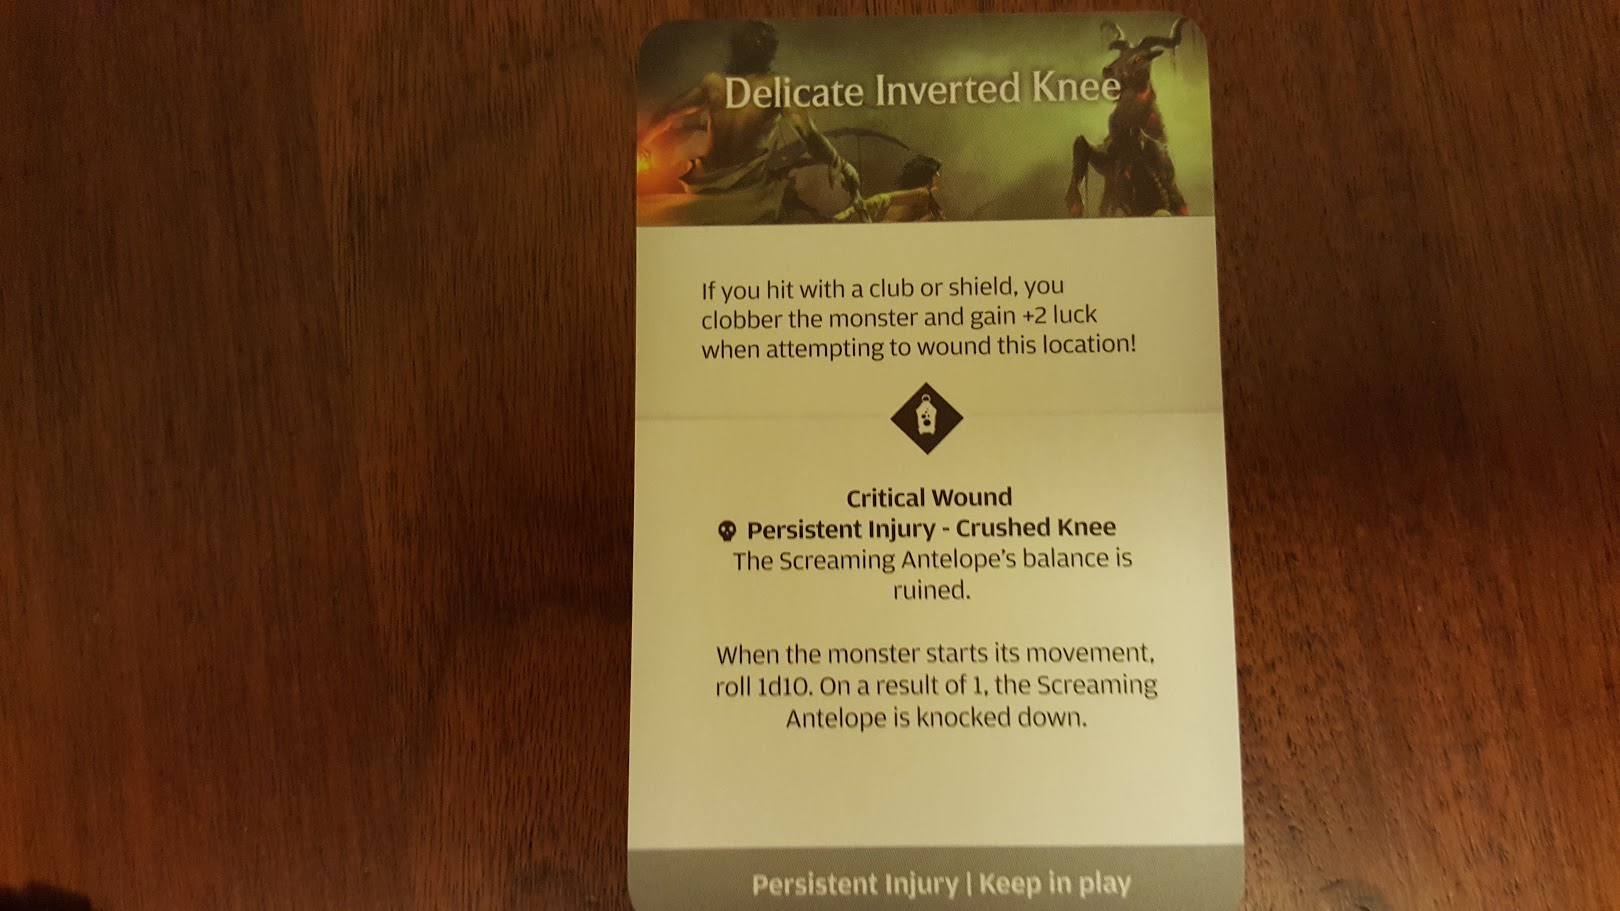
The Antelope can only move five spaces now though, due to its -1 movement, so Cullen catches up to it, once again savaging the beast with fist and tooth. He hits, and lands a critical on the Delicate Inverted Knee. The Antelope now has the Crushed Knee persistent wound.
Antelope draws Back Kick, hitting Cullen in the arms for 3 damage, but Cullen spends a Survival point to dodge it. Cullen retaliates, hitting but failing to damage the Giant Mouth.
The Antelope’s AI deck is shuffled, and Back Kick is drawn again. 3 damage to Cullen’s legs, which he spends his last Survival point to dodge.
Cullen’s axe finds the Antelope’s Restless Chest, but cannot penetrate its hide for a wound.
Slam is drawn, but since Cullen is in the blind spot, the Antelope can not see him. It grazes towards a plant, not quite reaching it. Cullen catches up, but misses his attack.
Stomp and Snort is drawn again, this time successfully intimidating Cullen. He’s knocked down and receives one brain damage, which removes his last insanity point.
Since Cullen is knocked down, the Antelope activates again. Stomp and Snort is drawn again after a shuffle of the few remaining AI cards. Cullen receives another brain damage, and stands up at the end of the Antelope’s turn.
He moves around to the blind spot again, hitting with a lantern 10. He wounds the Antelope’s Restless Inner Thigh, causing another -1 movement for the monster. Only two AI cards left for the Antelope. 3 more wounds and it dies.
The Antelope is not pleased. It draws Back Kick, blasting Cullen for 3 damage in the legs. With no more Survival to dodge, it causes a severe damage roll. The force of the Antelope’s thunderous kick has torn one of Cullen’s legs clean off. He suffers a permanent -2 movement and receives a bleeding token. He crumples to the ground, knocked down.
The Antelope takes his turn again, as Cullen is knocked down. Stomp and Snort. The intimdate is successful, causing a brain damage and a brain trauma roll. Cullen loses 2 levels of weapon proficiency… that’s fine, he doesn’t have any to lose yet. Cullen pulls himself to his feet… err, foot.
With his one leg, Cullen cannot reach the Antelope’s blind spot. So instead he simply hops alongside the creature. He misses his attack.
The Antelope Back Kicks. 3 damage to Cullen’s head. His White Lion Helm takes all of it. The hunter’s head is still intact.
Cullen hops into the blind spot, but even with the additional accuracy, cannot land a hit. Back Kick is drawn again, but it misses!
Cullen makes his attack, but fails to wound the Restless Hoof.
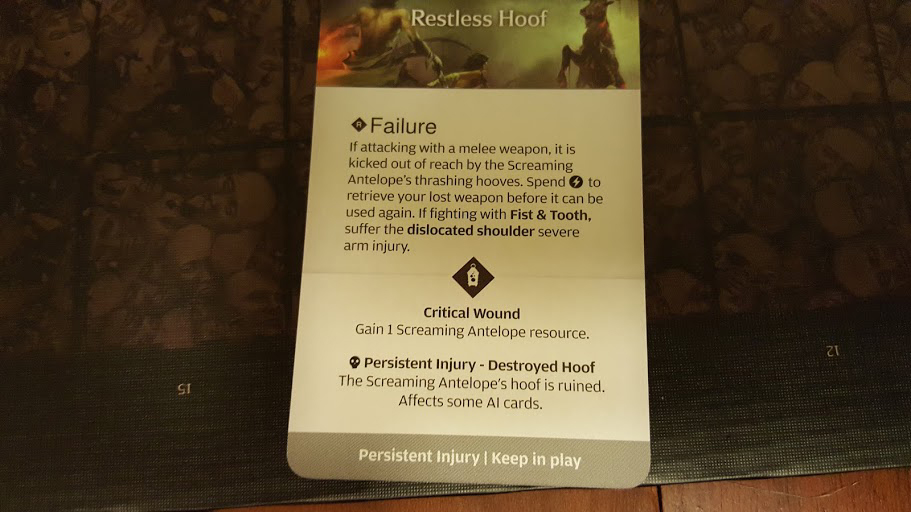
He suffers a dislocated shoulder injury, preventing him from using 2h weapons and gaining another bleeding token.
The Antelope Stomps and Snorts. Cullen is knocked down, and suffers brain trauma which gains him 3 insanity. As the hunter is knocked down, the Antelope goes again, drawing Back Kick. The severe damage to his body collapses Cullen’s lung. He gains a bleeding token, and -1 movement due to being unable to catch his breath. Defiant, Cullen stands up.
He lashes out, clawing at the Antelope’s Giant Tongue.
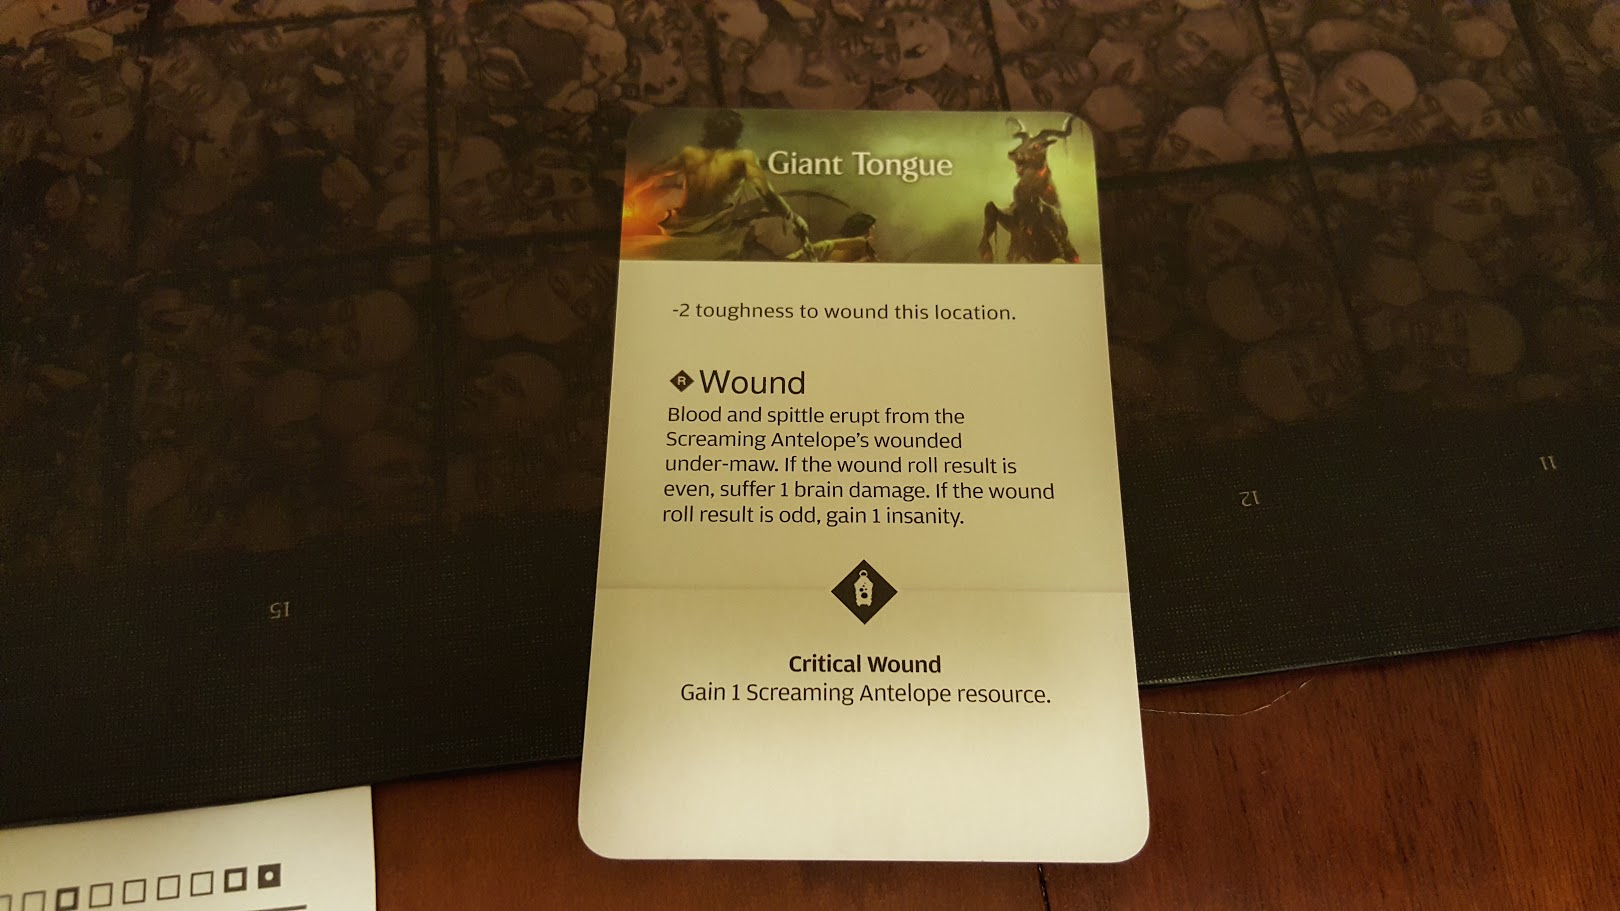
He wounds it, suffering 1 brain damage for his efforts. It’s absorbed by his newfound insanity.
The Antelope draws the only AI card left to it… Back Kick. 3 damage to Cullen’s arms. He is knocked down and suffers Contracture, -1 accuracy and another bleeding token. The monster draws Back Kick again, determined to finish off its foe. The attack dismembers one of Cullen’s arms, gaining him his fifth and final bleeding token.
The darkness presses in as Cullen exsanguinates on the cold floor of stone faces, the monstrous Antelope bleating in triumph the last sounds he hears.
Back at the settlement, when the survivors do not return, Aria rabidly beats her head in grief, gaining the Deaf severe head injury.
At this point I could continue on with the Settlement Phase… I have enough population to draft new survivors for another hunt, and the campaign could straggle on. However, instead I’m going to call this the end of this particular campaign and these write-ups. I feel it’s an appropriately dark and dire place to end. While I love playing this game, and sharing the experience, recording/writing up these sessions is incredibly time-consuming. I also have a campaign in progress with friends, and I’d prefer experience some of the game’s later events/hunts for the first time with them.
I hope you’ve all enjoyed this little look at Kingdom Death: Monster, though, and perhaps have even been enticed to grab it for a campaign with your own friends 🙂